Troubleshooting & Installation Guide
Follow these steps to successfully install and test your UGR86 USB GPS Receiver.
We suggest the following steps to Install
Download Files
Download the following files to your Download Folder:
- File 1 (Drivers): CP210x_Windows_Drivers.zip
- File 2 (GPS Coordinates): Black Box GPS Analyser_V1
(If V1 is not working for checking, then use Black Box Live GPS Analyser-Web Version)
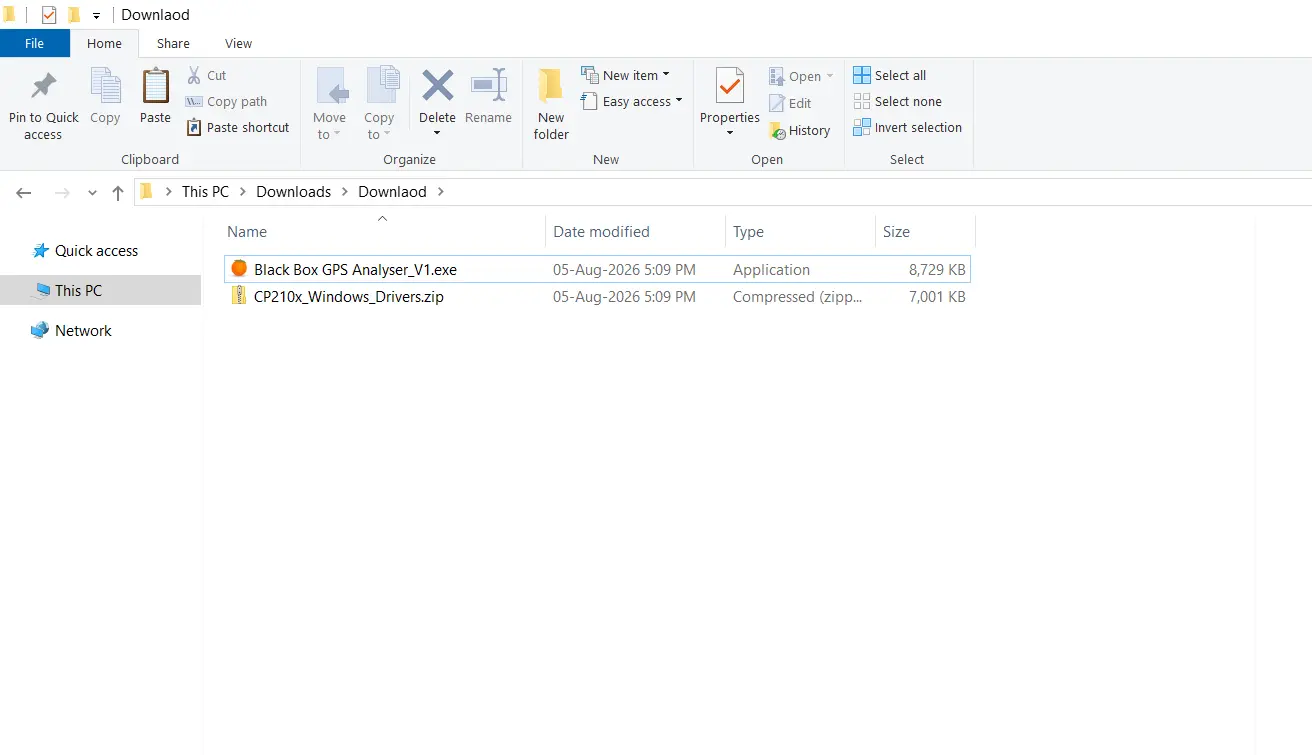
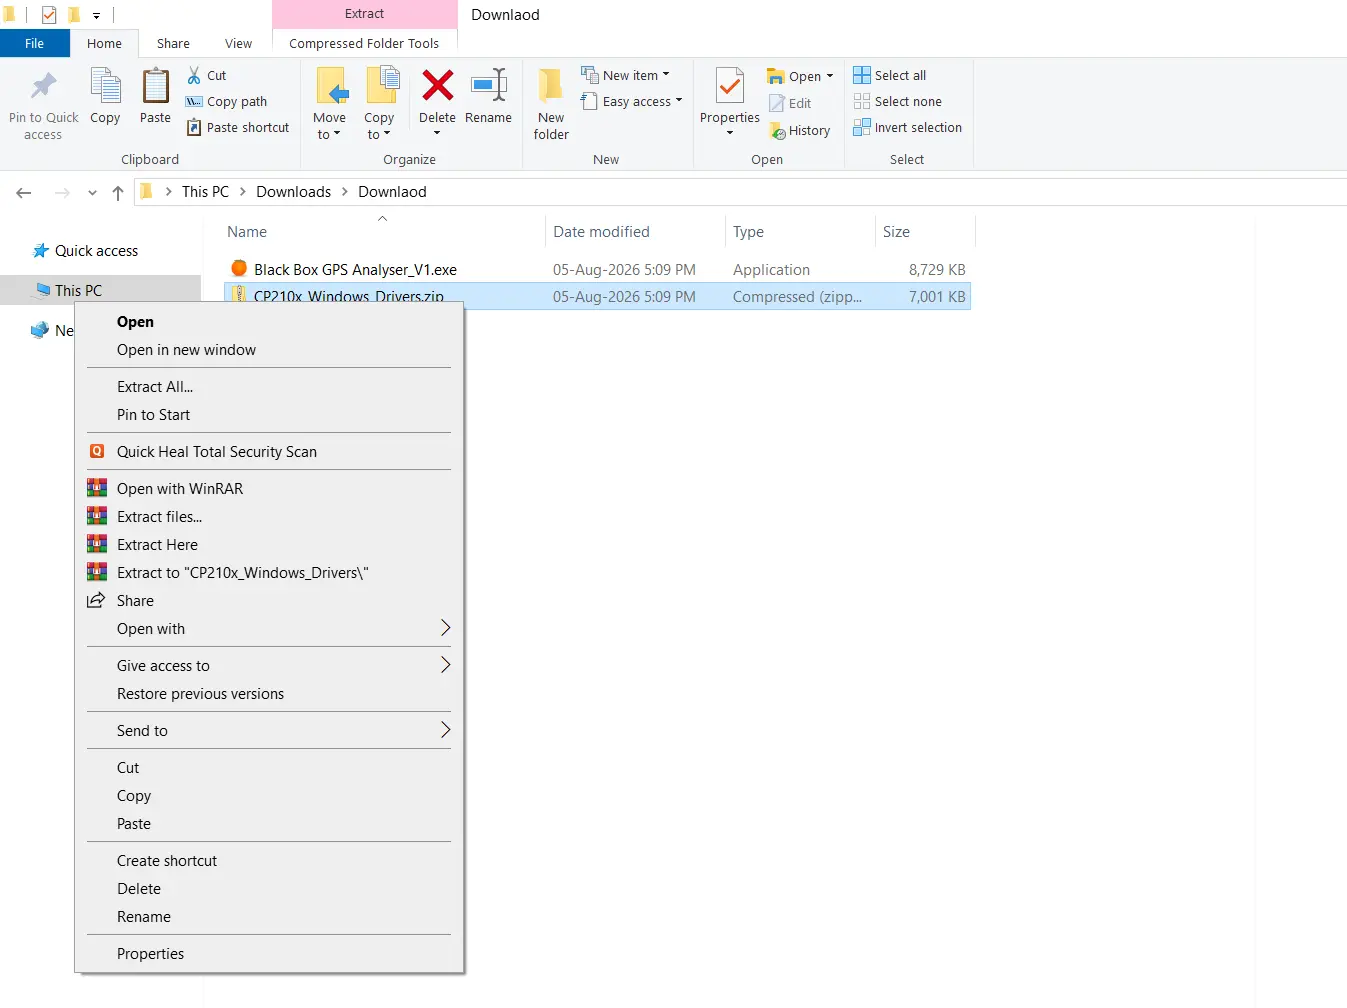
Right Click on the ZIP file named CP210x_Windows_Drivers.zip > Click on 'Extract All'.
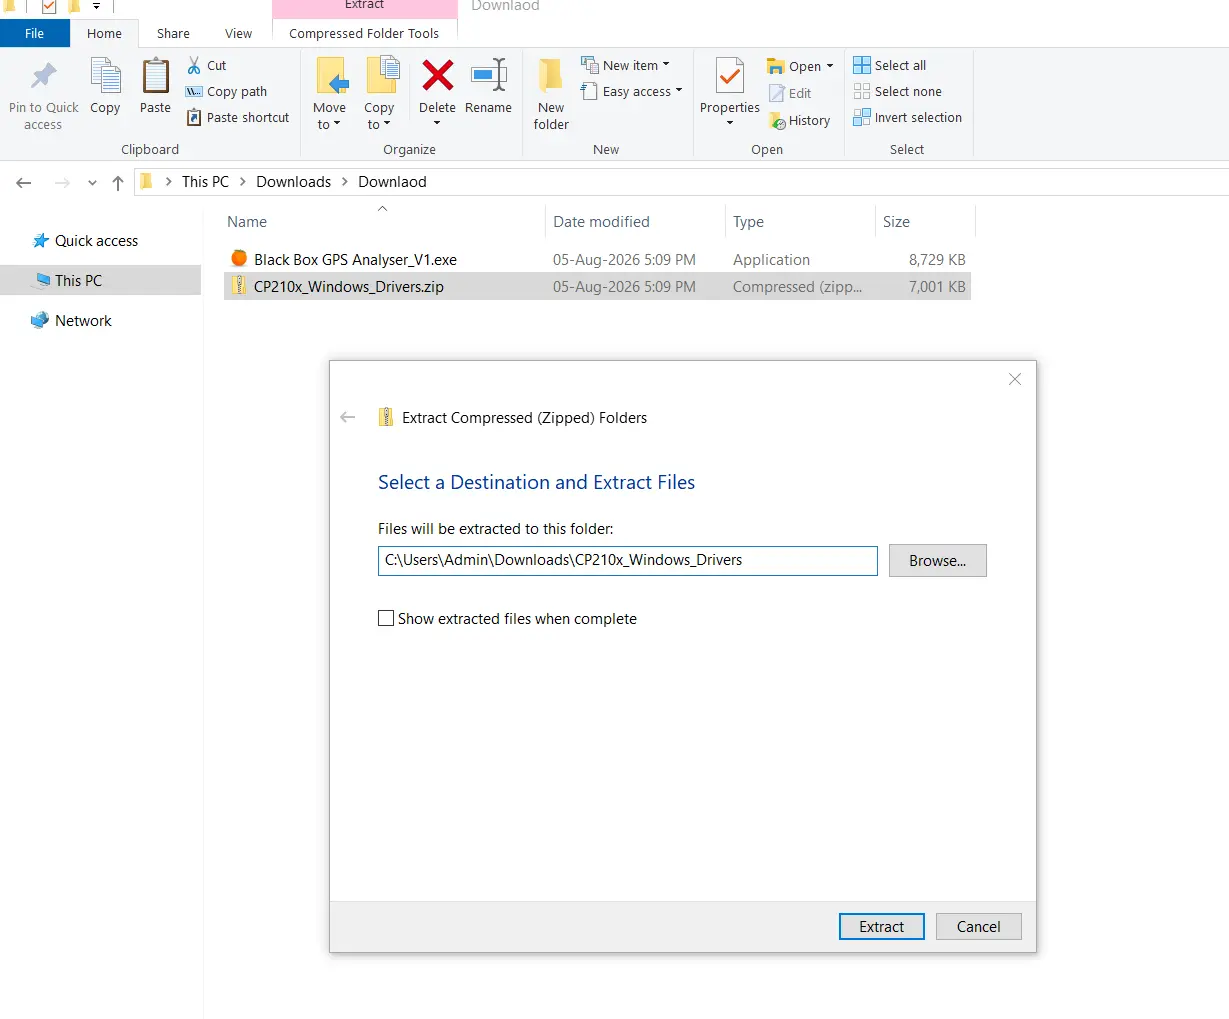
Then Click 'Extract'.
Connect the Device through USB Computer Cable and Open "Device Manager".
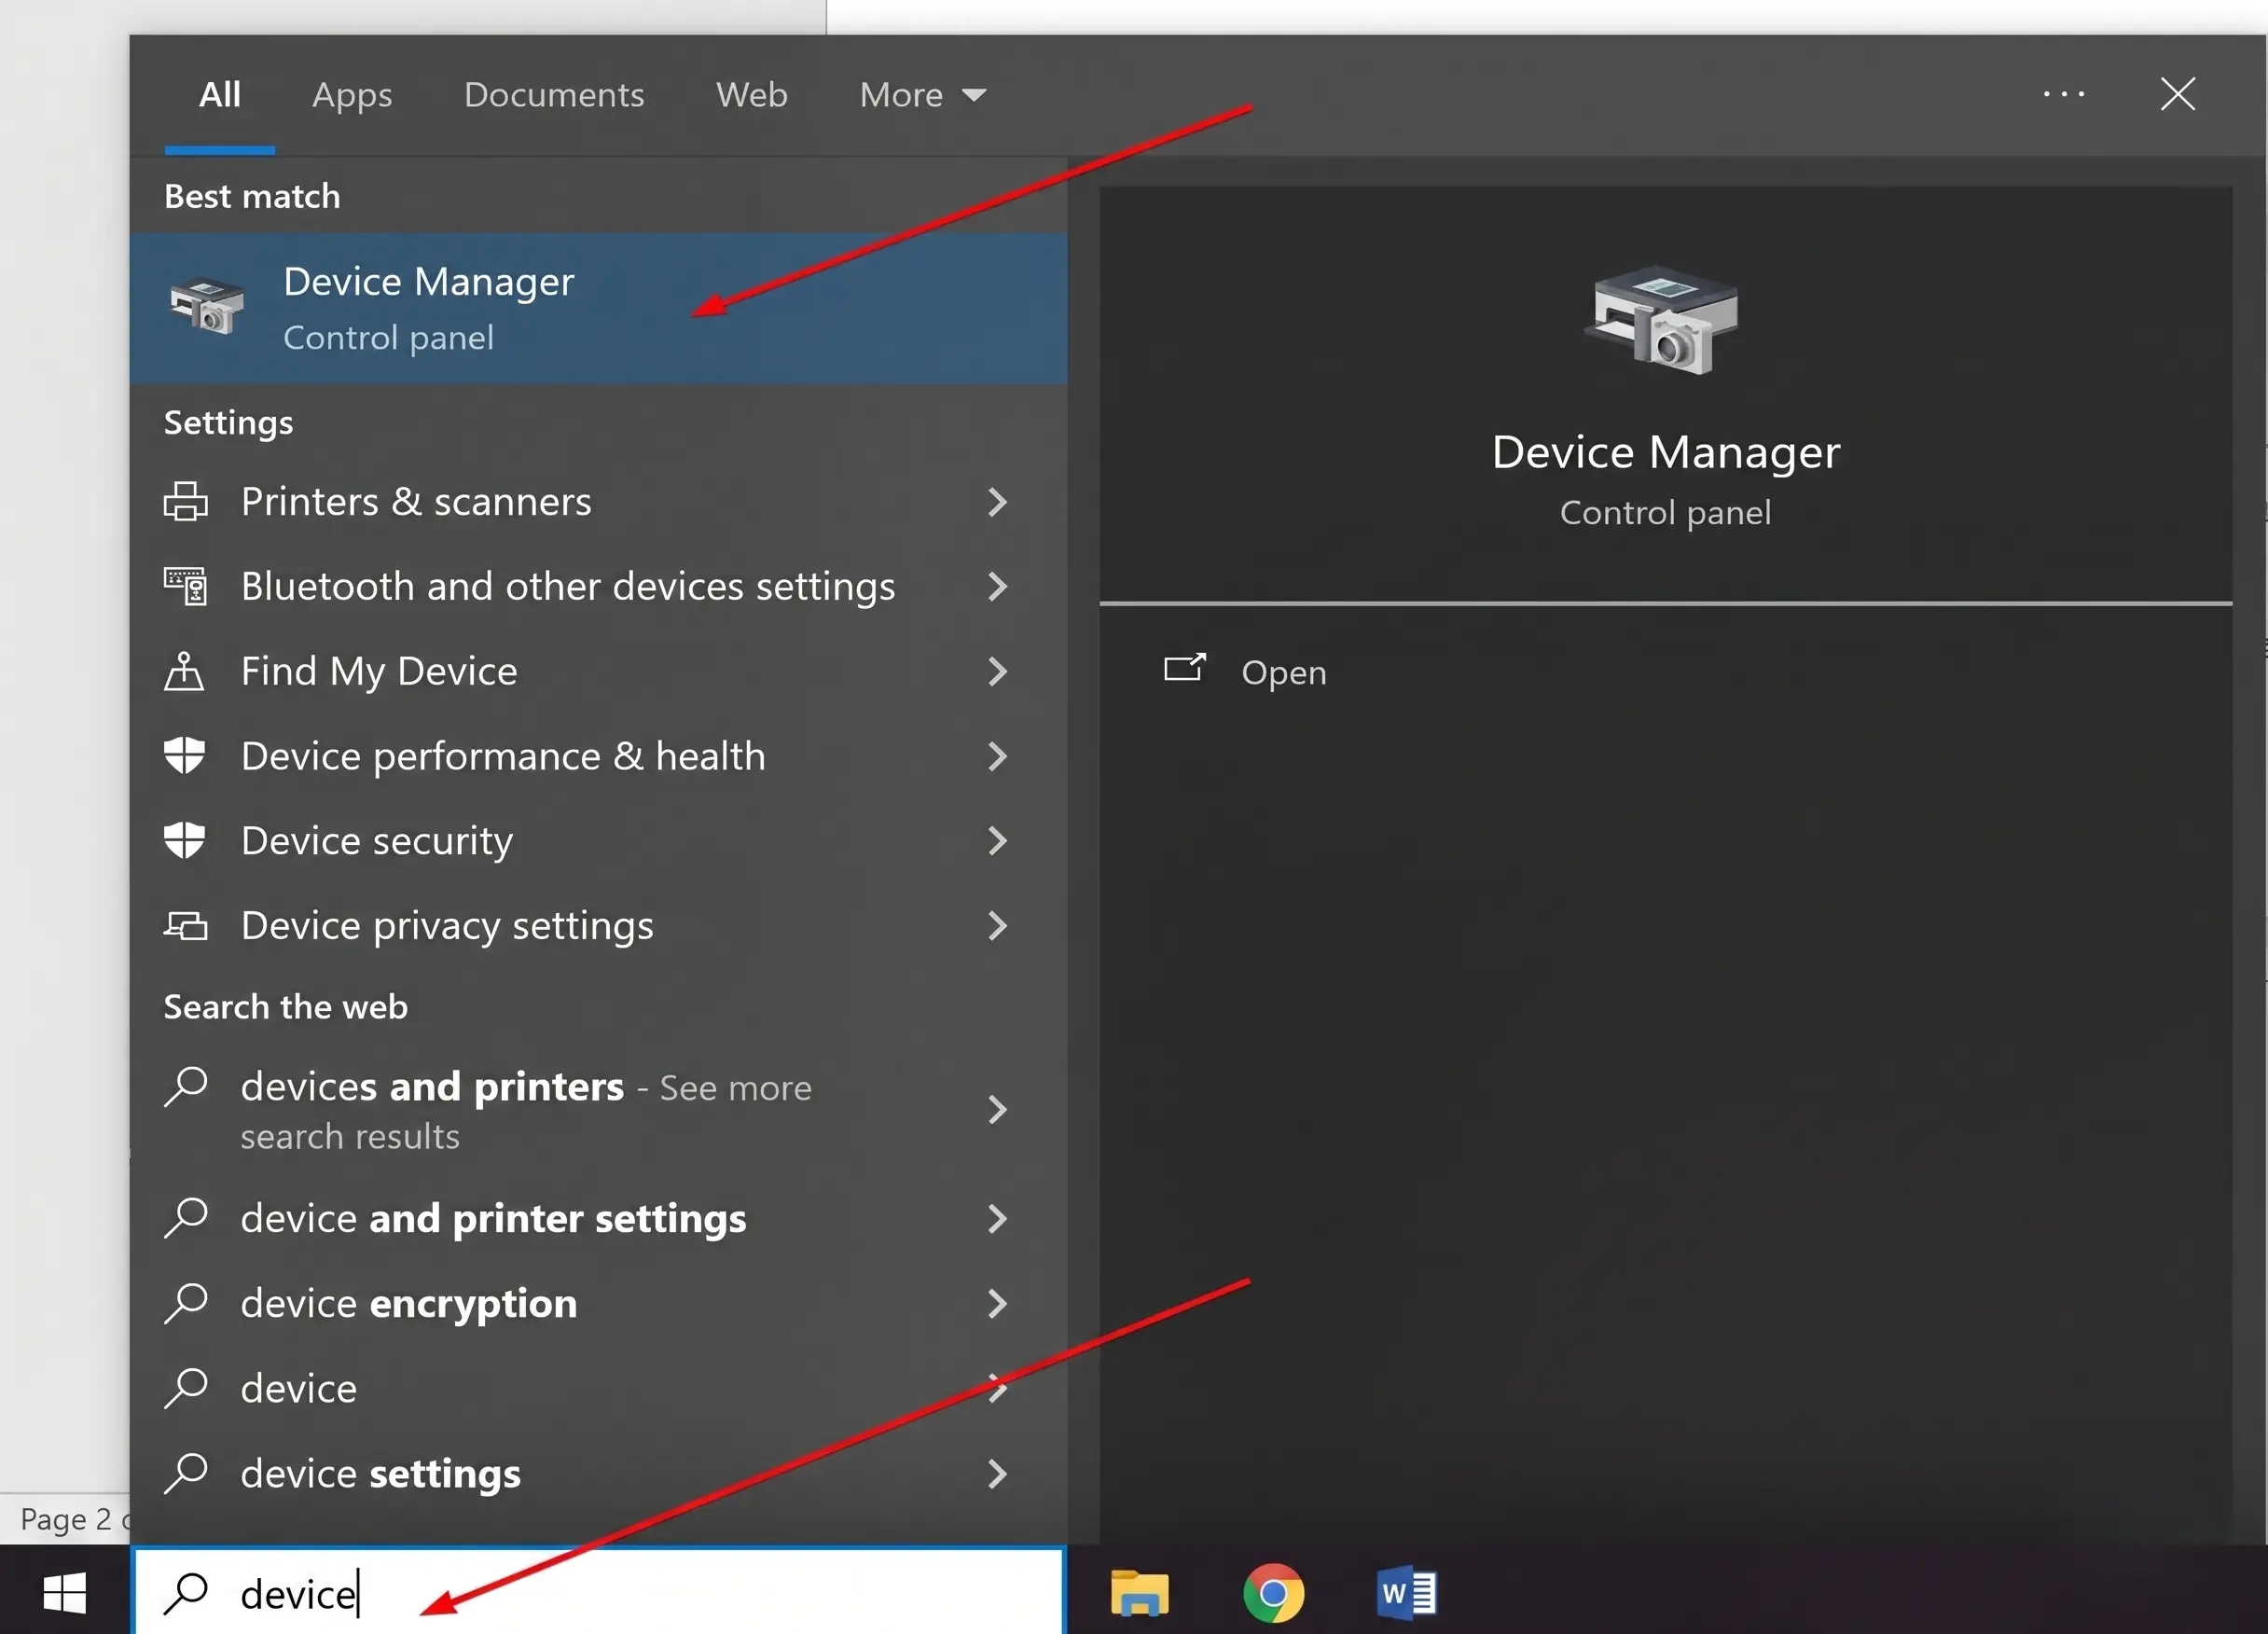
In Device Manager, under Other Devices, locate the device named "CP2102 USB to UART Bridge Controller".
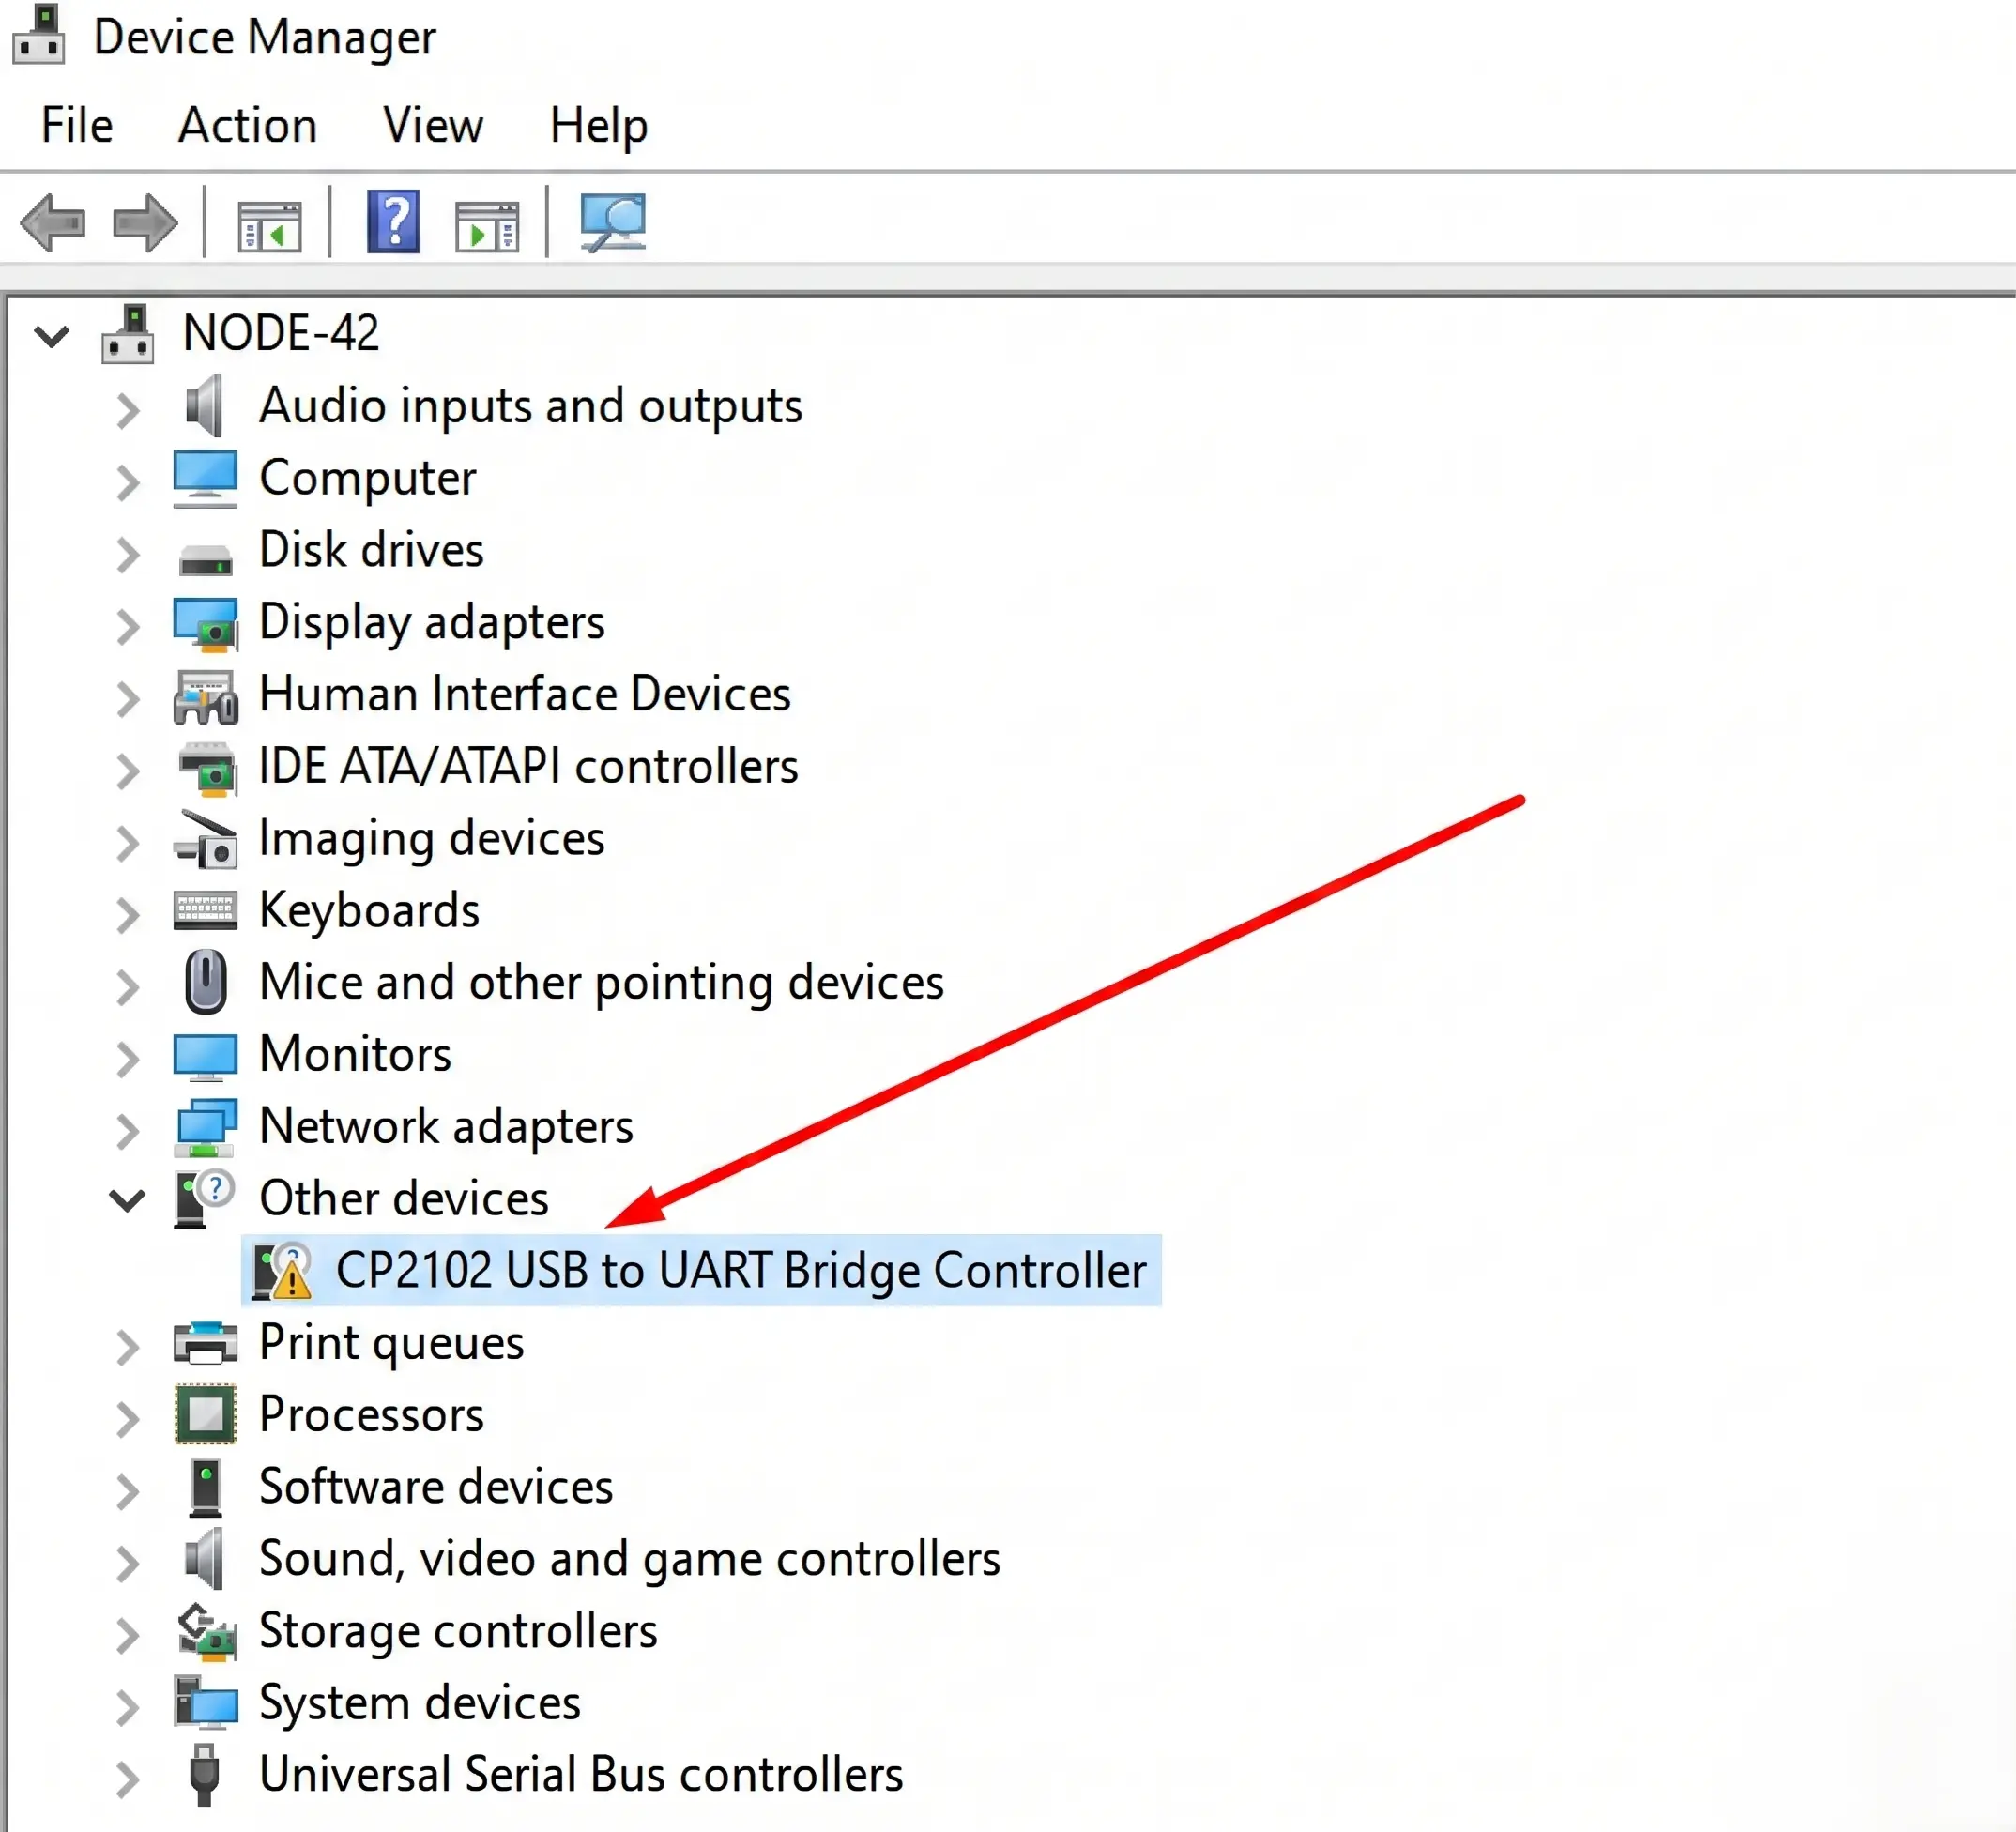
Right Click on "CP2102 USB to UART Bridge Controller" then click on "Update Driver".
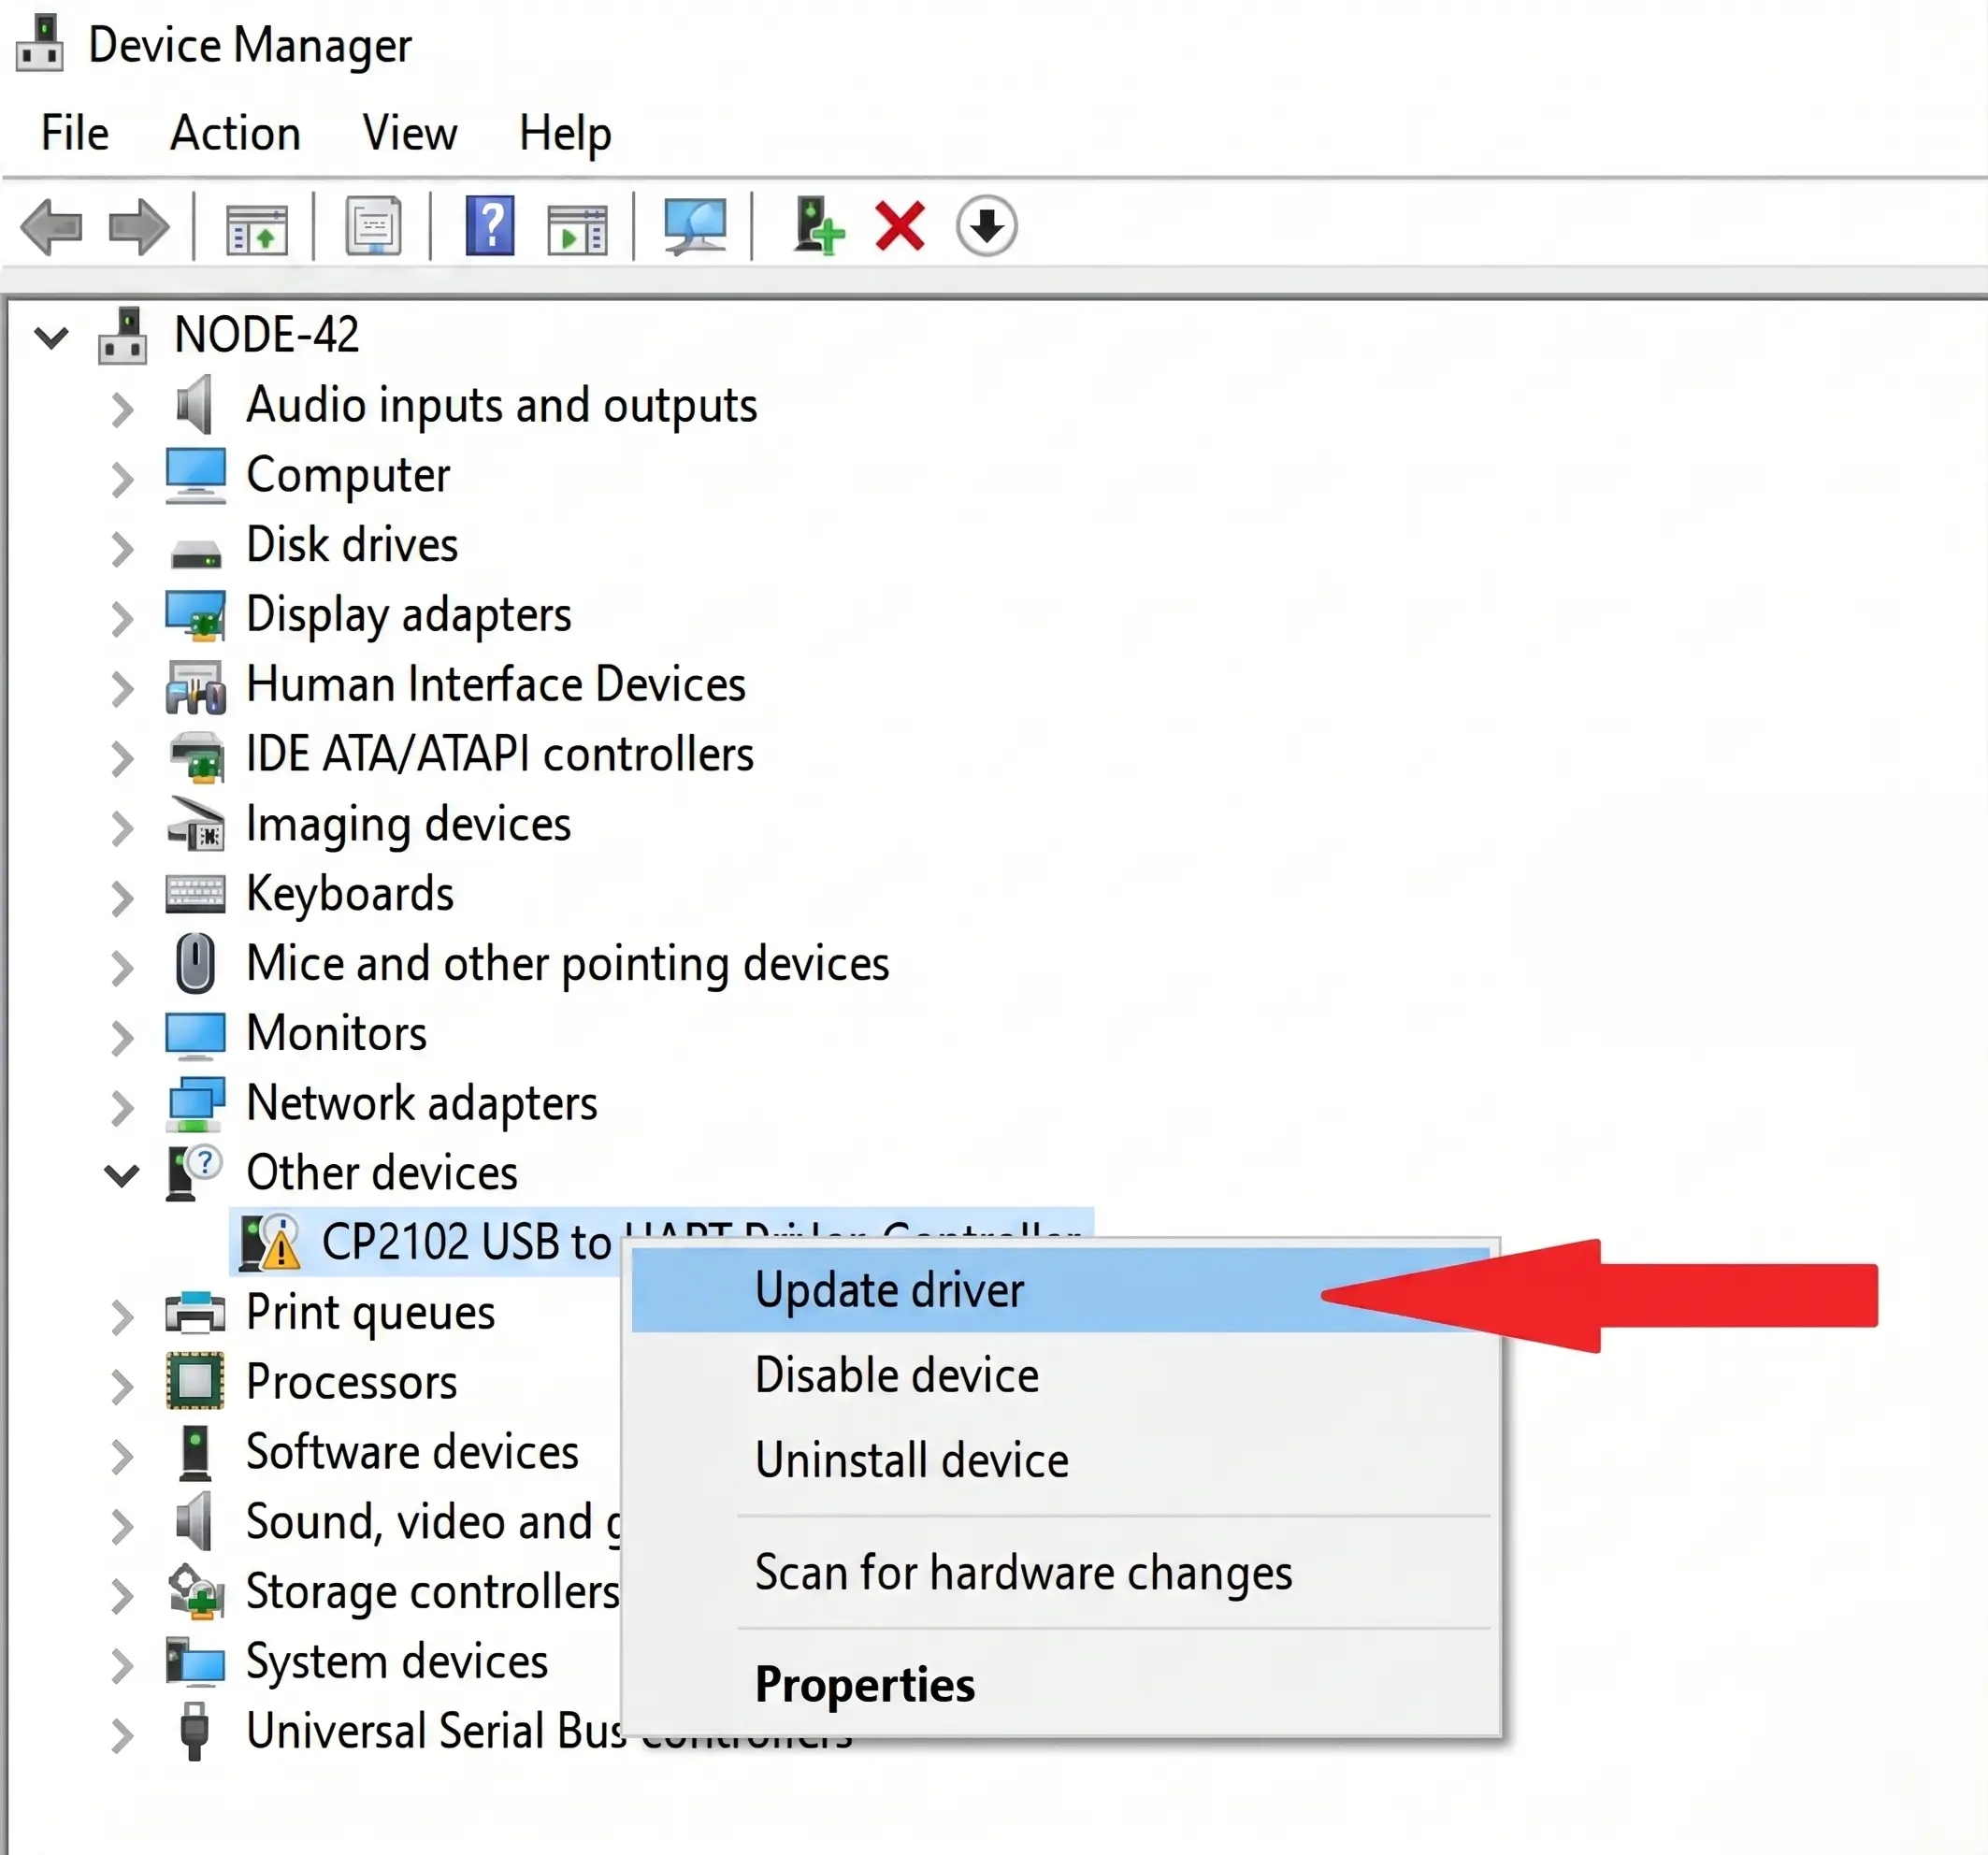
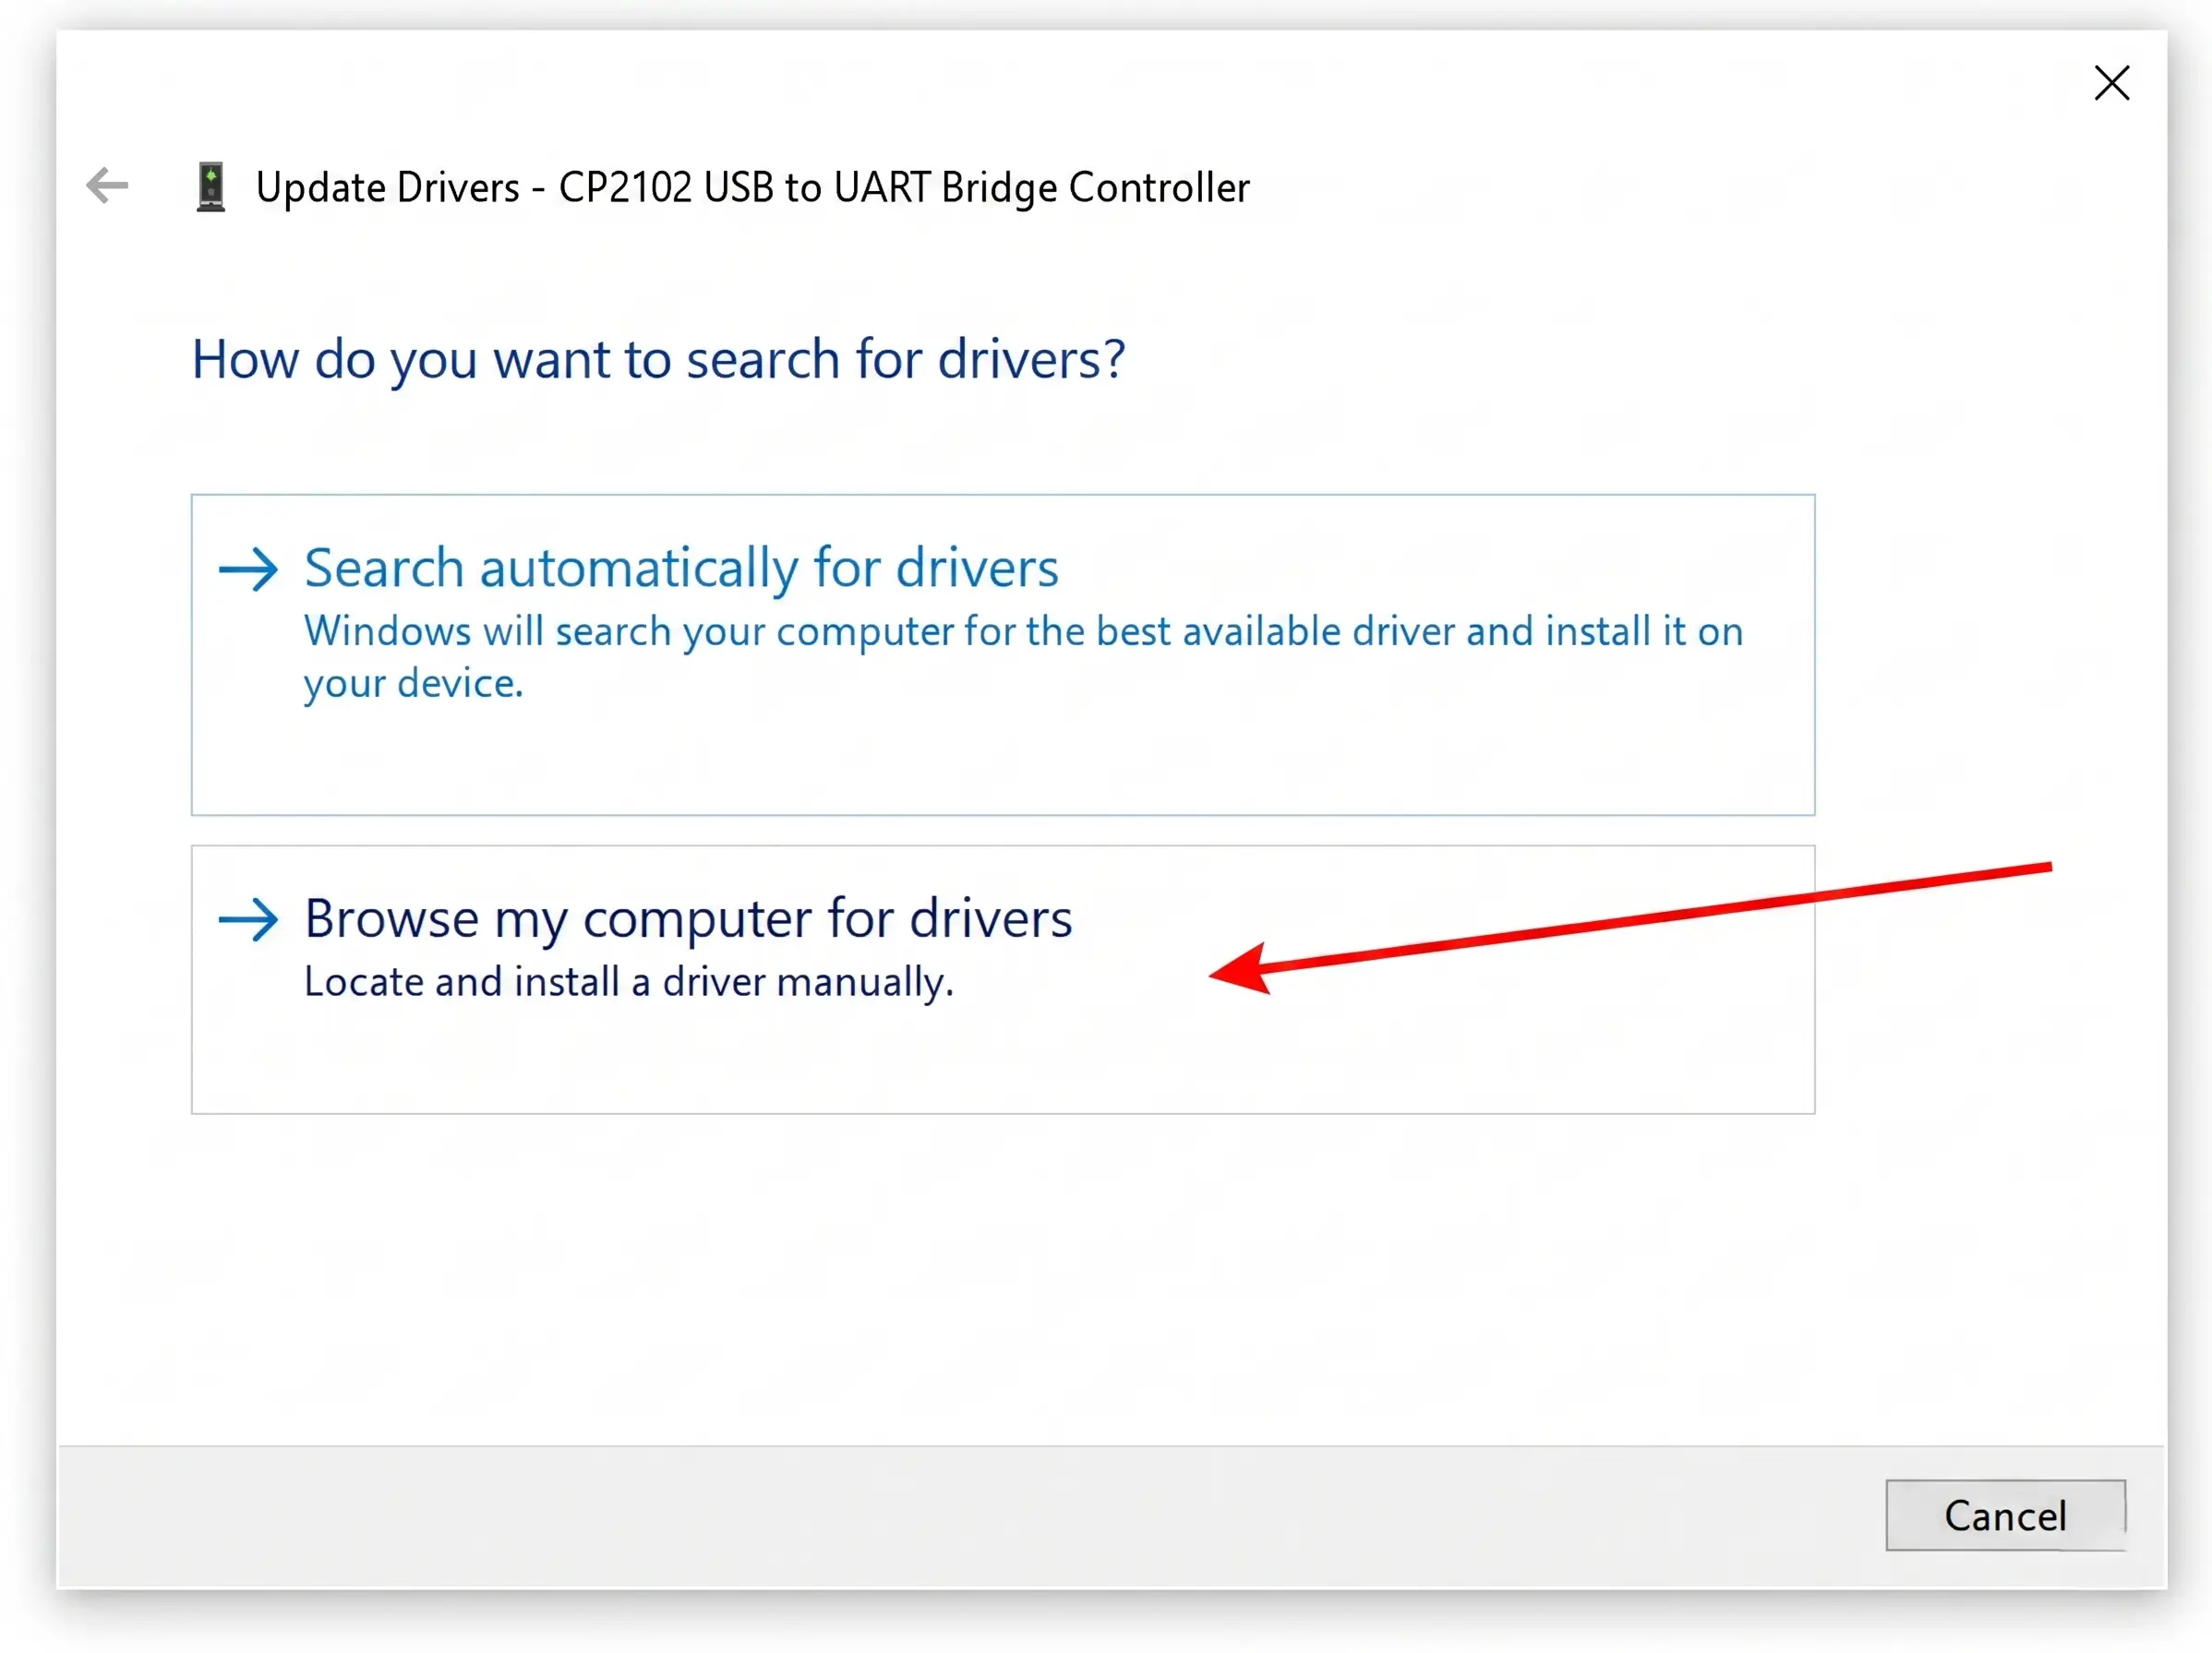
Click "Browse my computer for drivers".
Click "Browse".
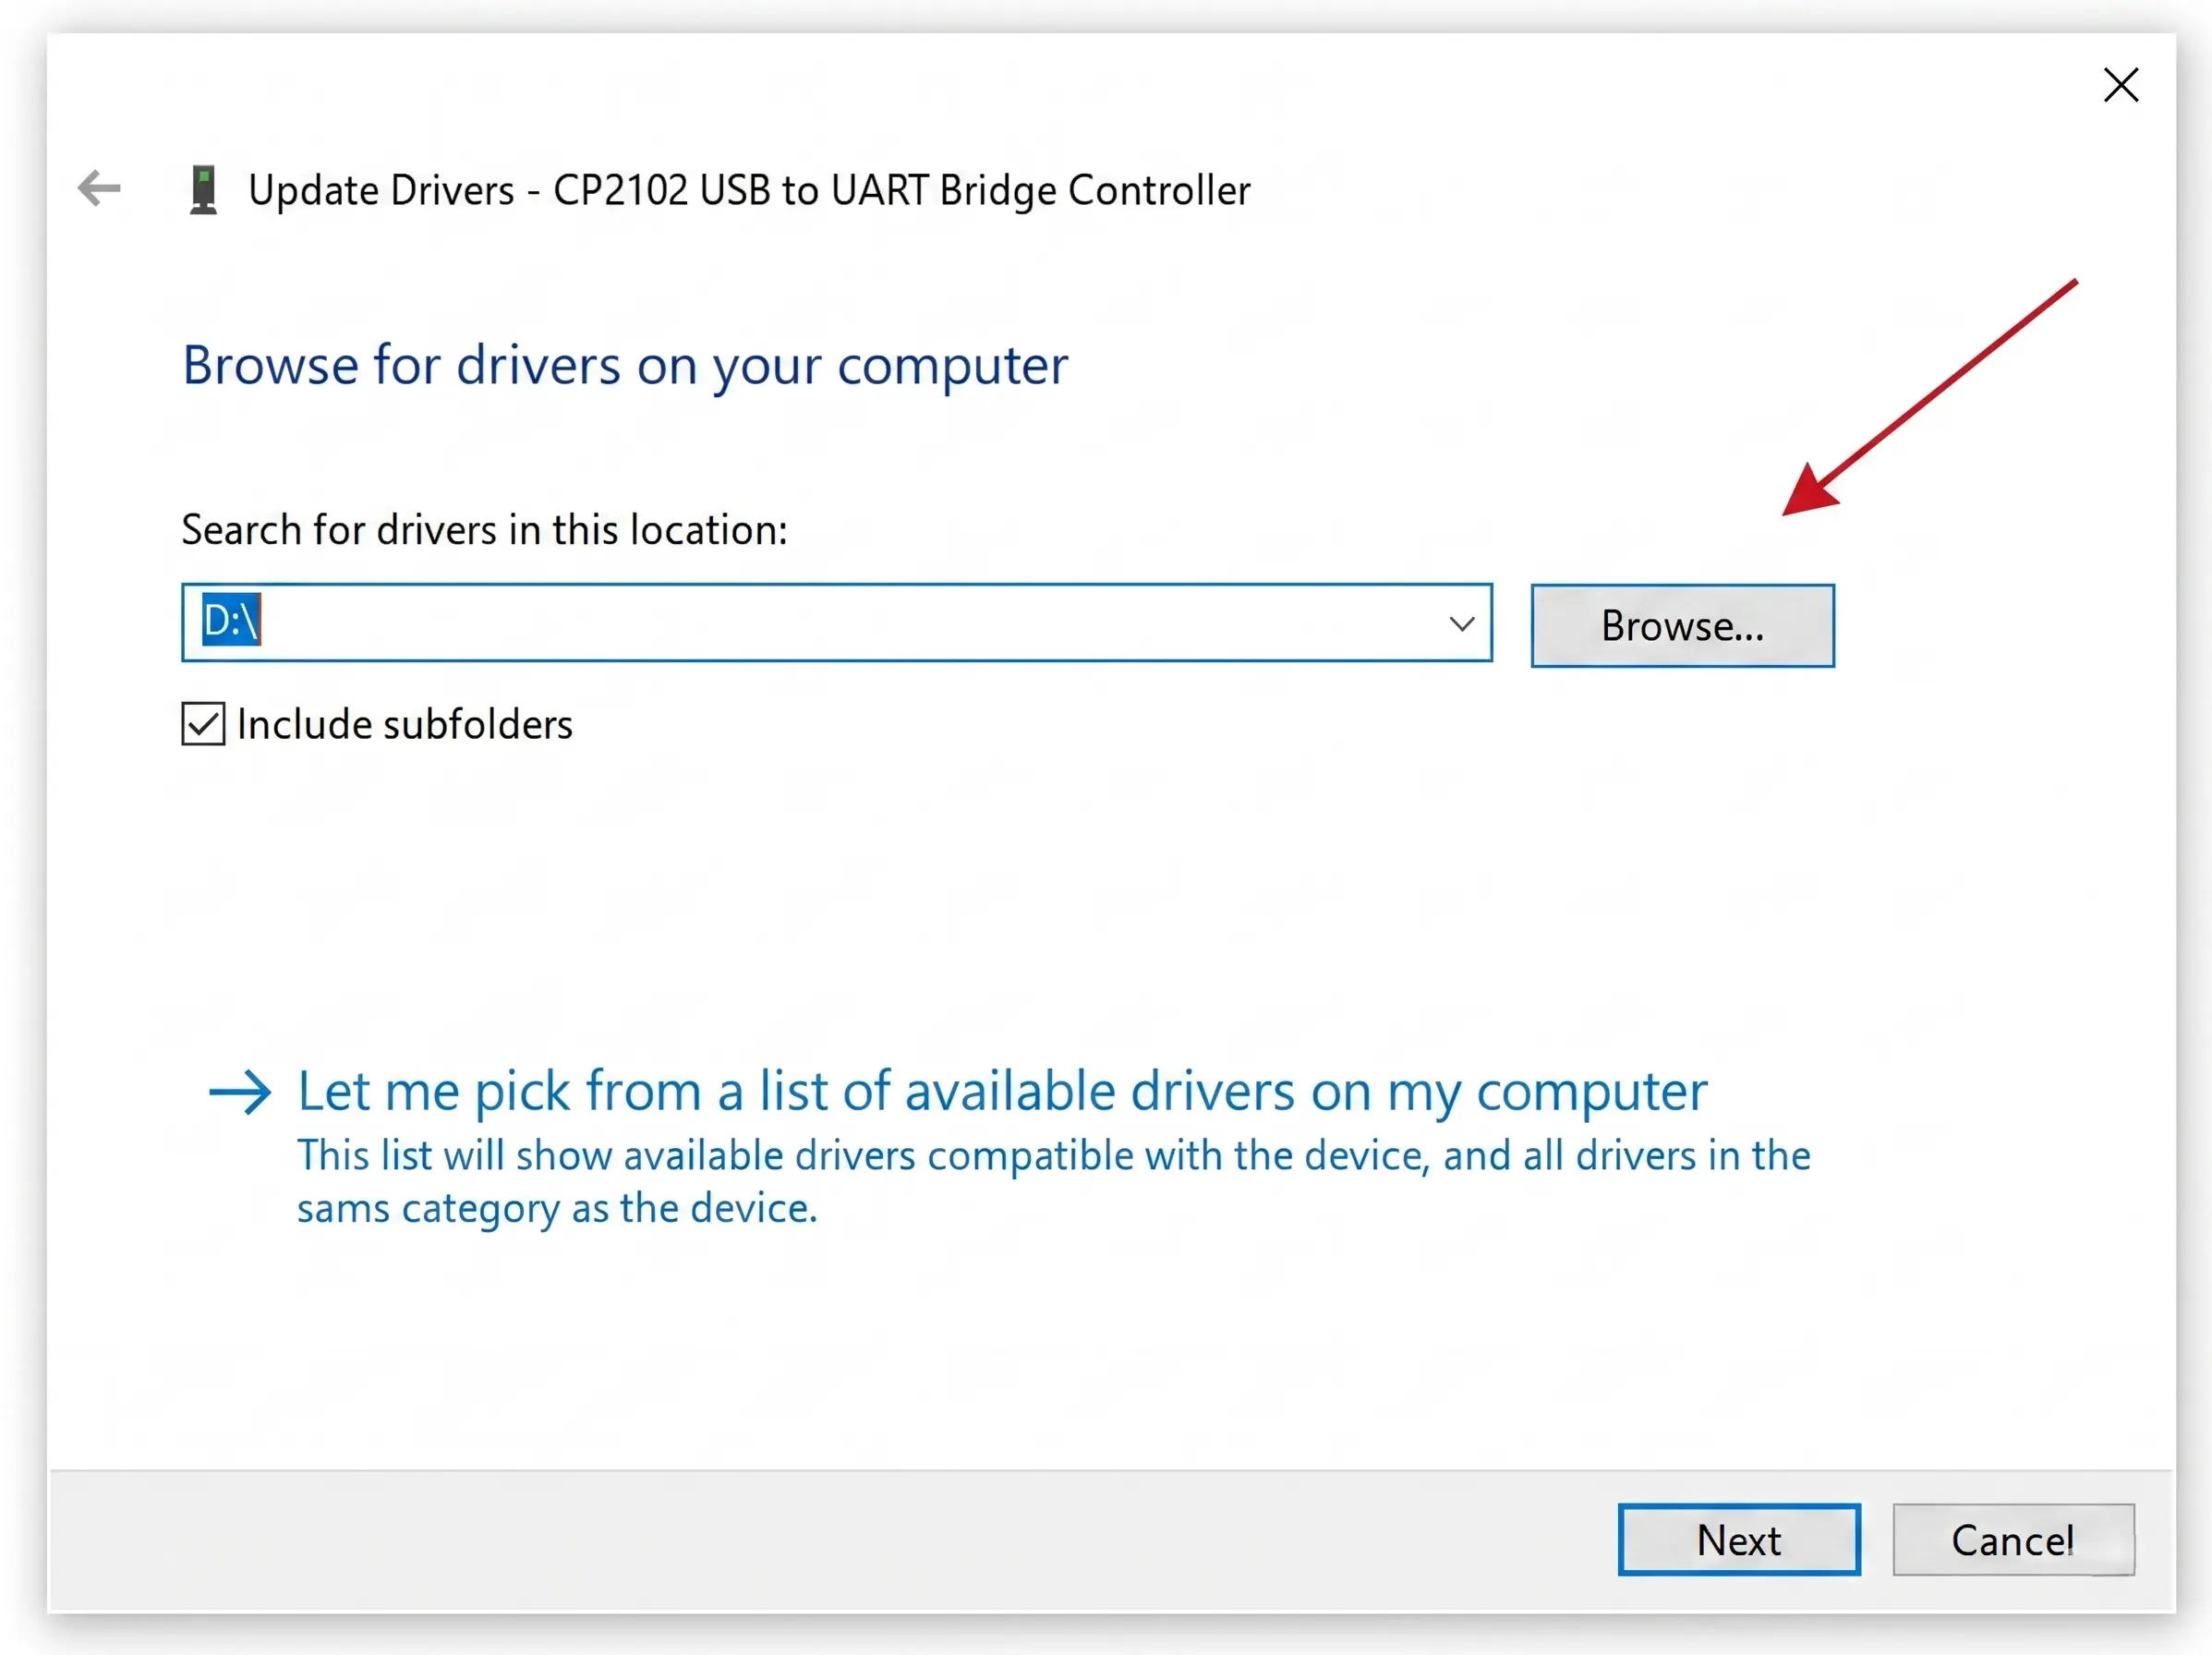
Select the path for the drivers where it was downloaded (usually in C:\Users\user\Downloads\CP210x_Windows_Drivers).
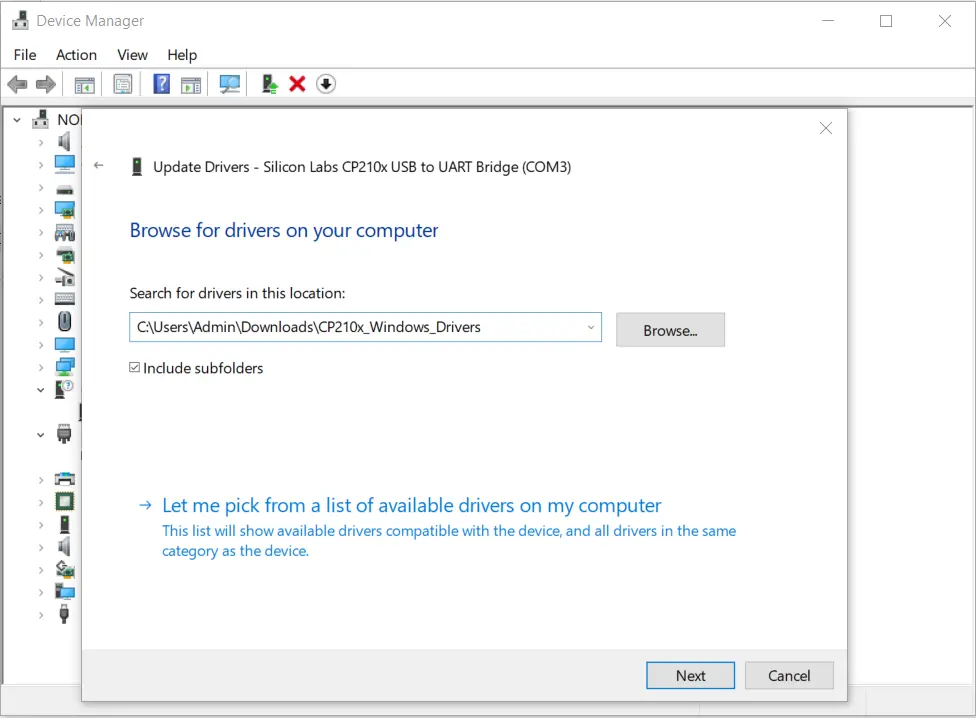
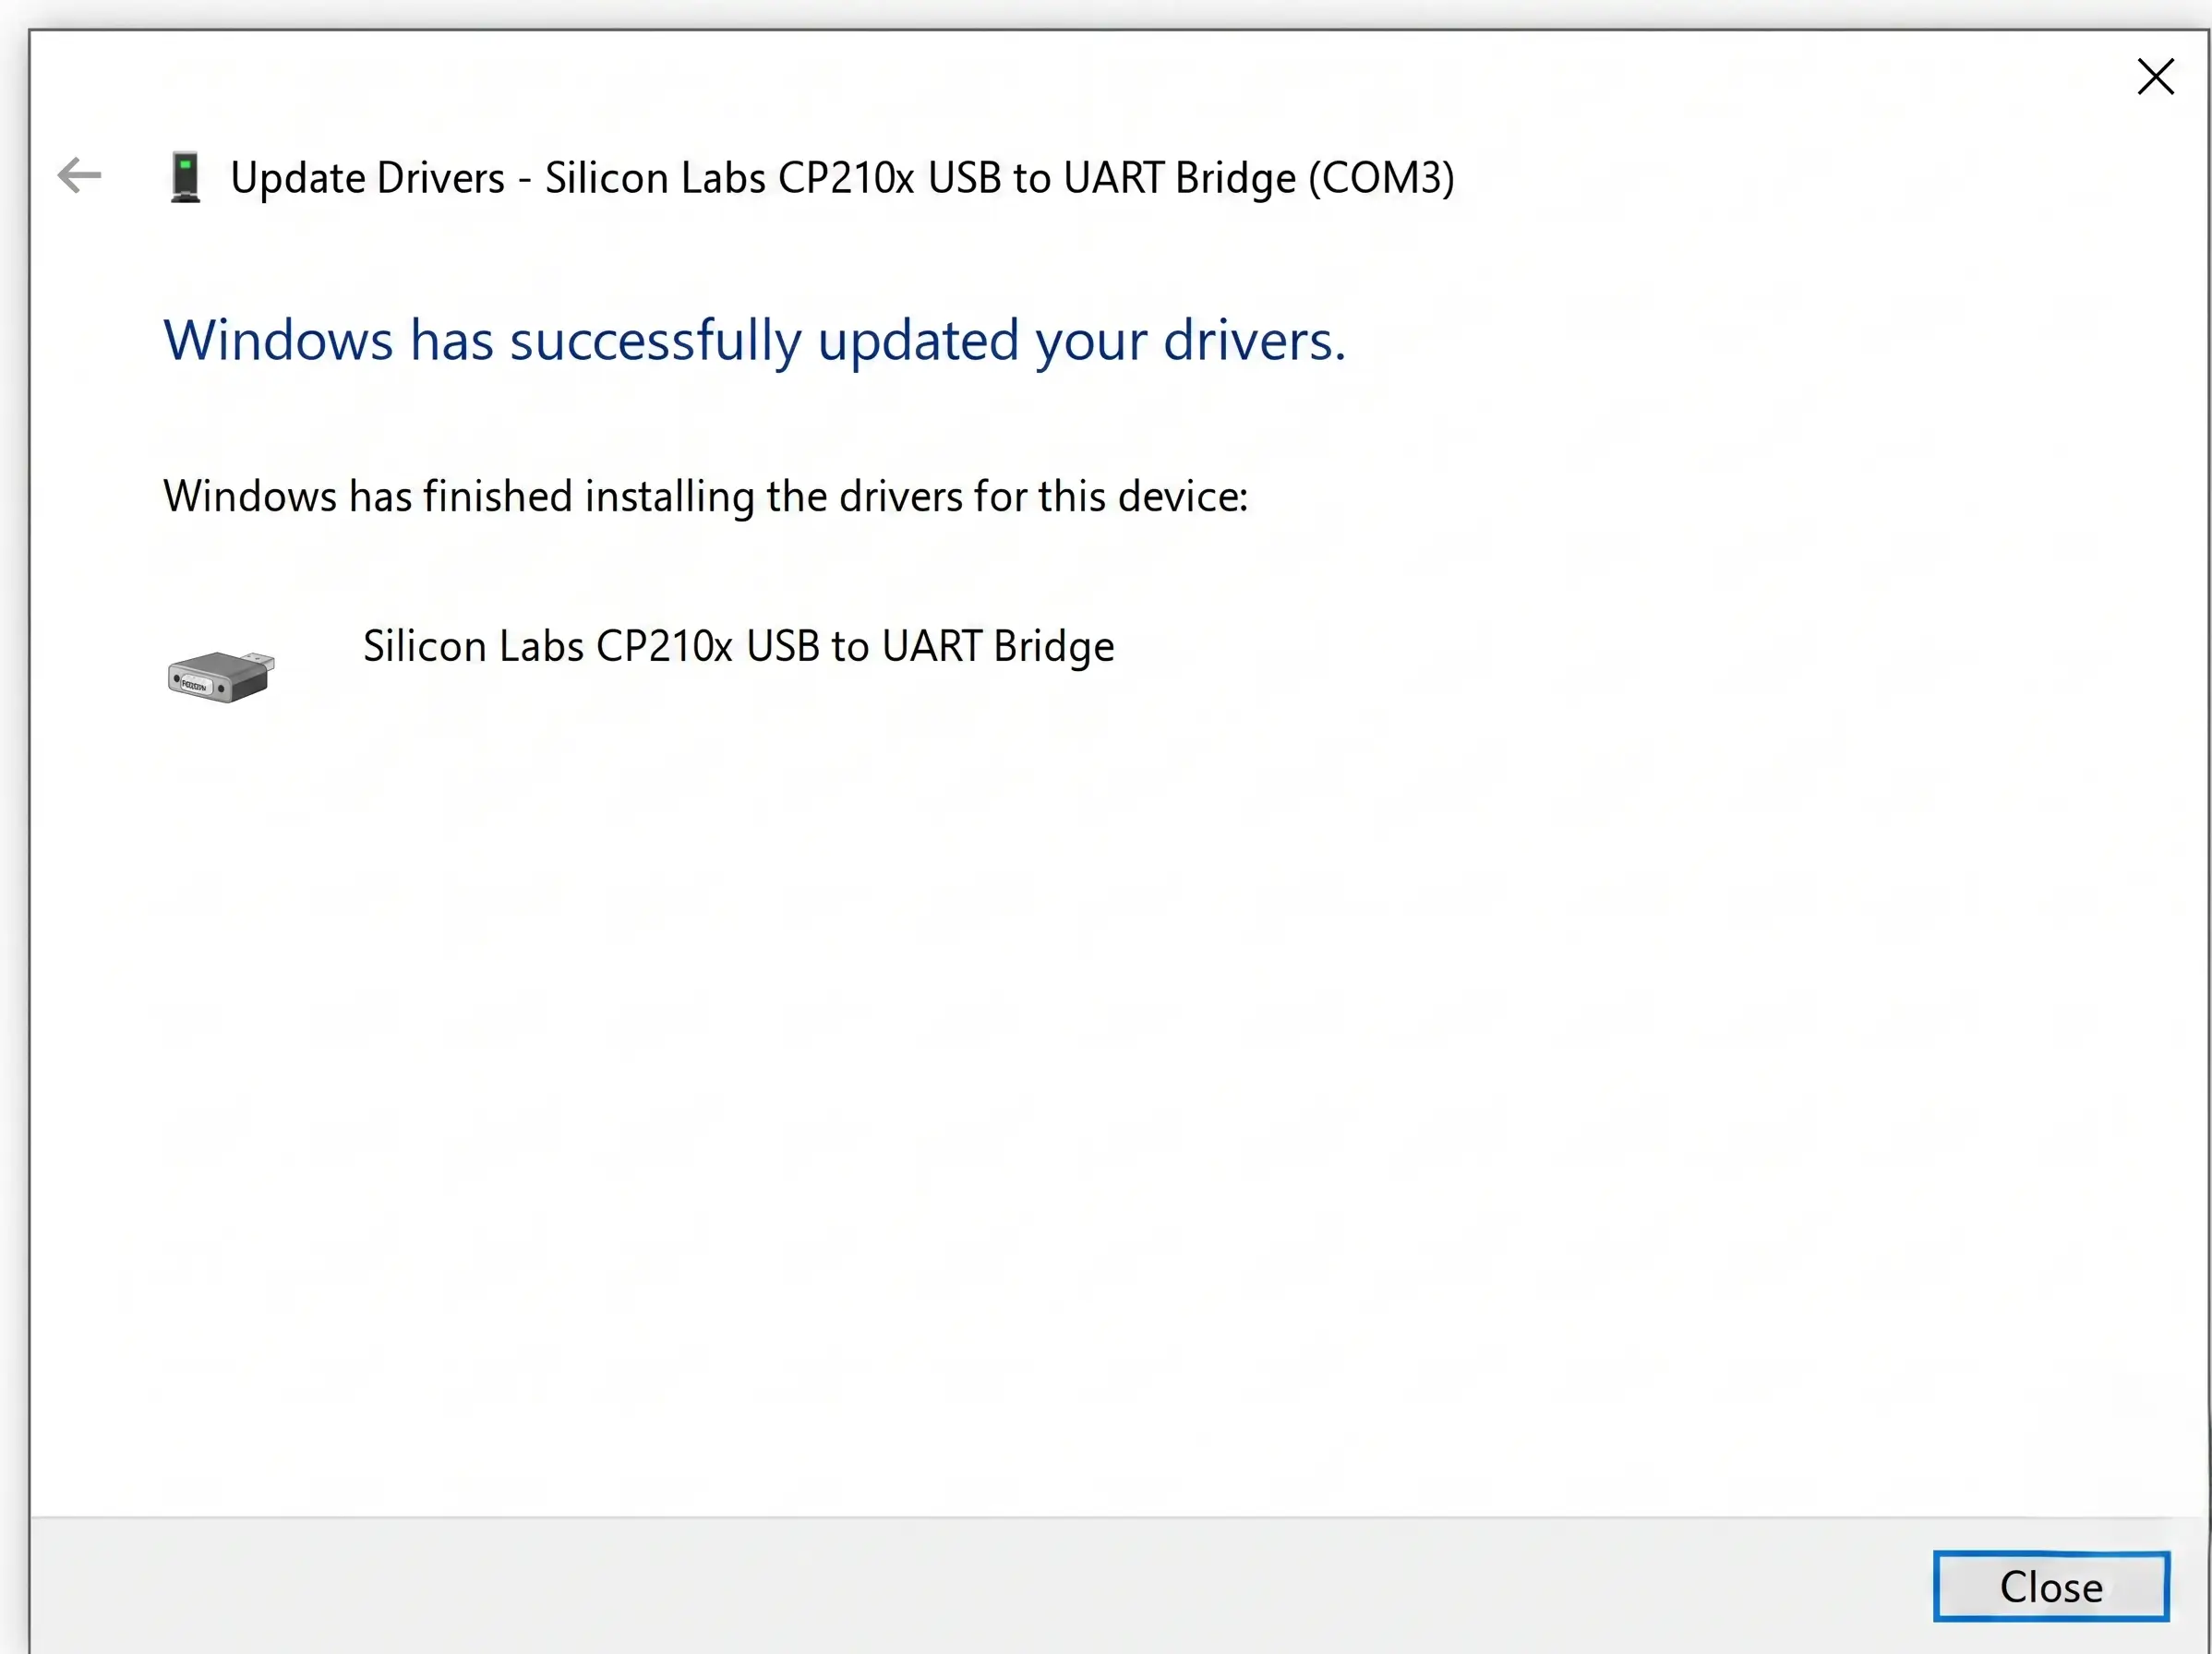
Click "Next". A popup will appear saying "Windows has successfully updated your drivers".
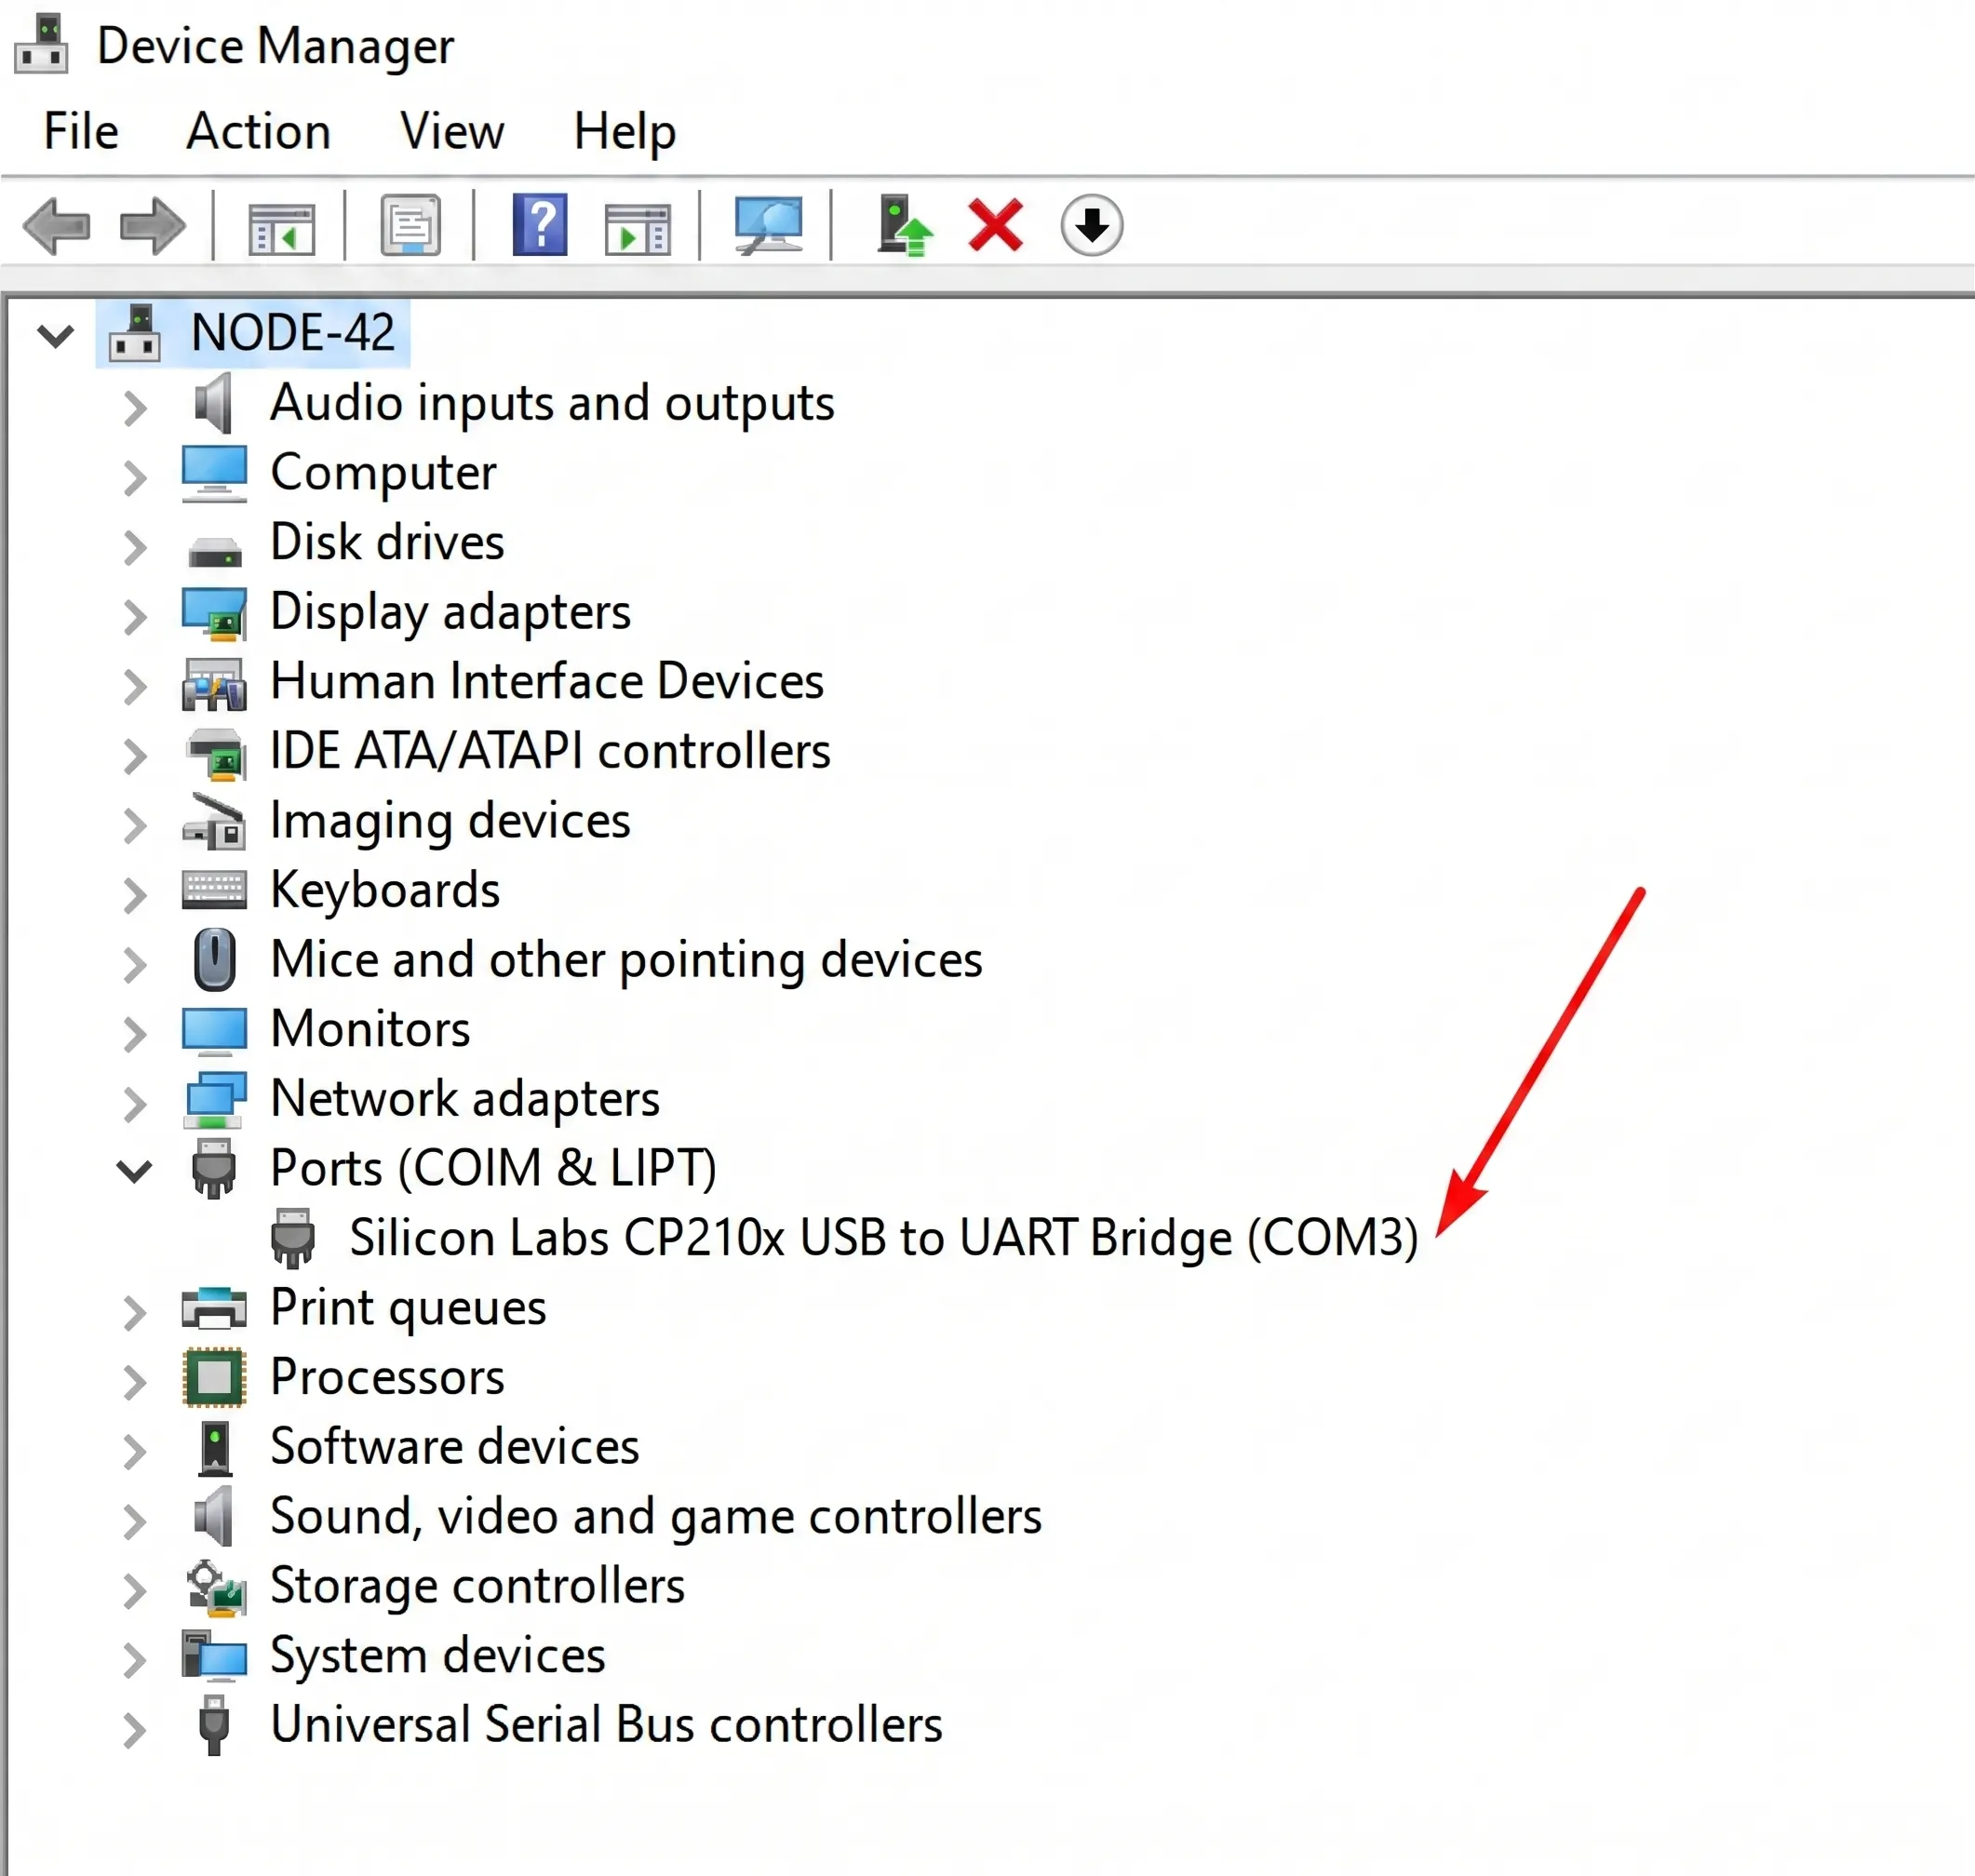
Check Port Settings
After driver installation, the device will be shown under the Ports Tab as "Silicon Labs CP210x USB to UART Bridge".
Disconnect and reconnect the device after changing the COM port.
Verify GPS Coordinates
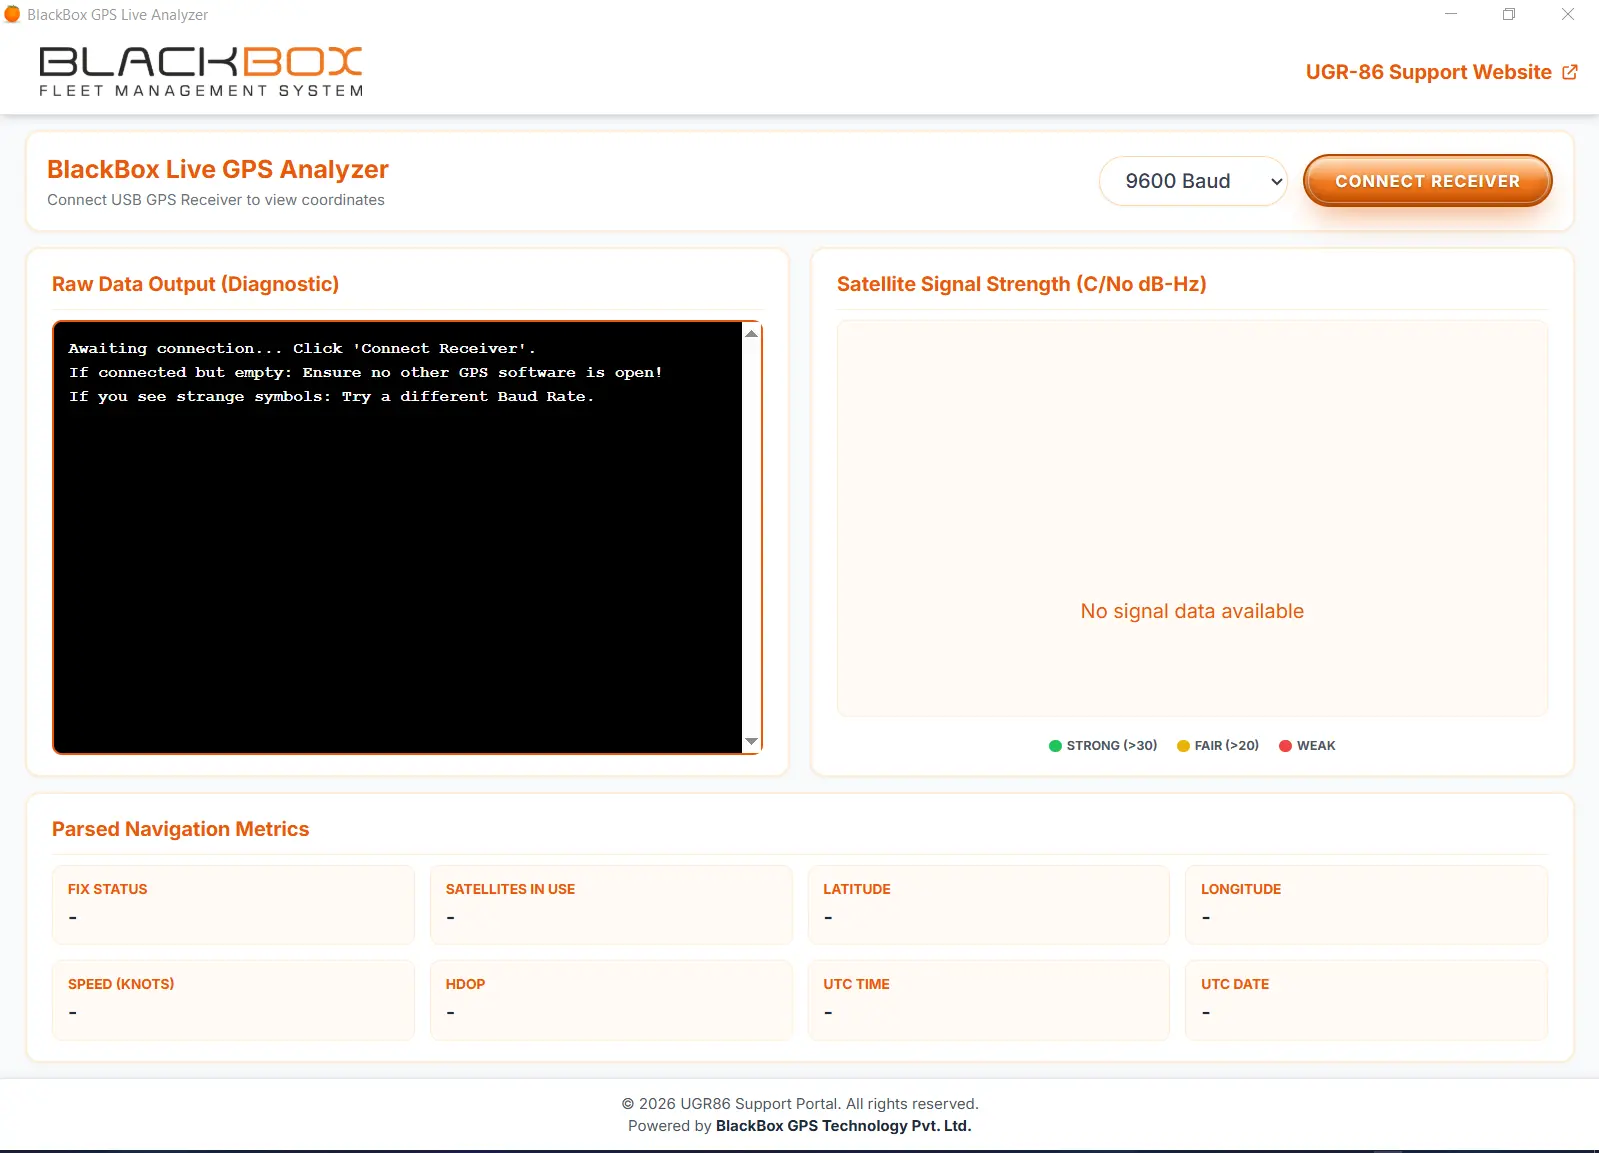
To check the GPS Coordinates, go to your downloads folder and open Black Box GPS Analyser V1.
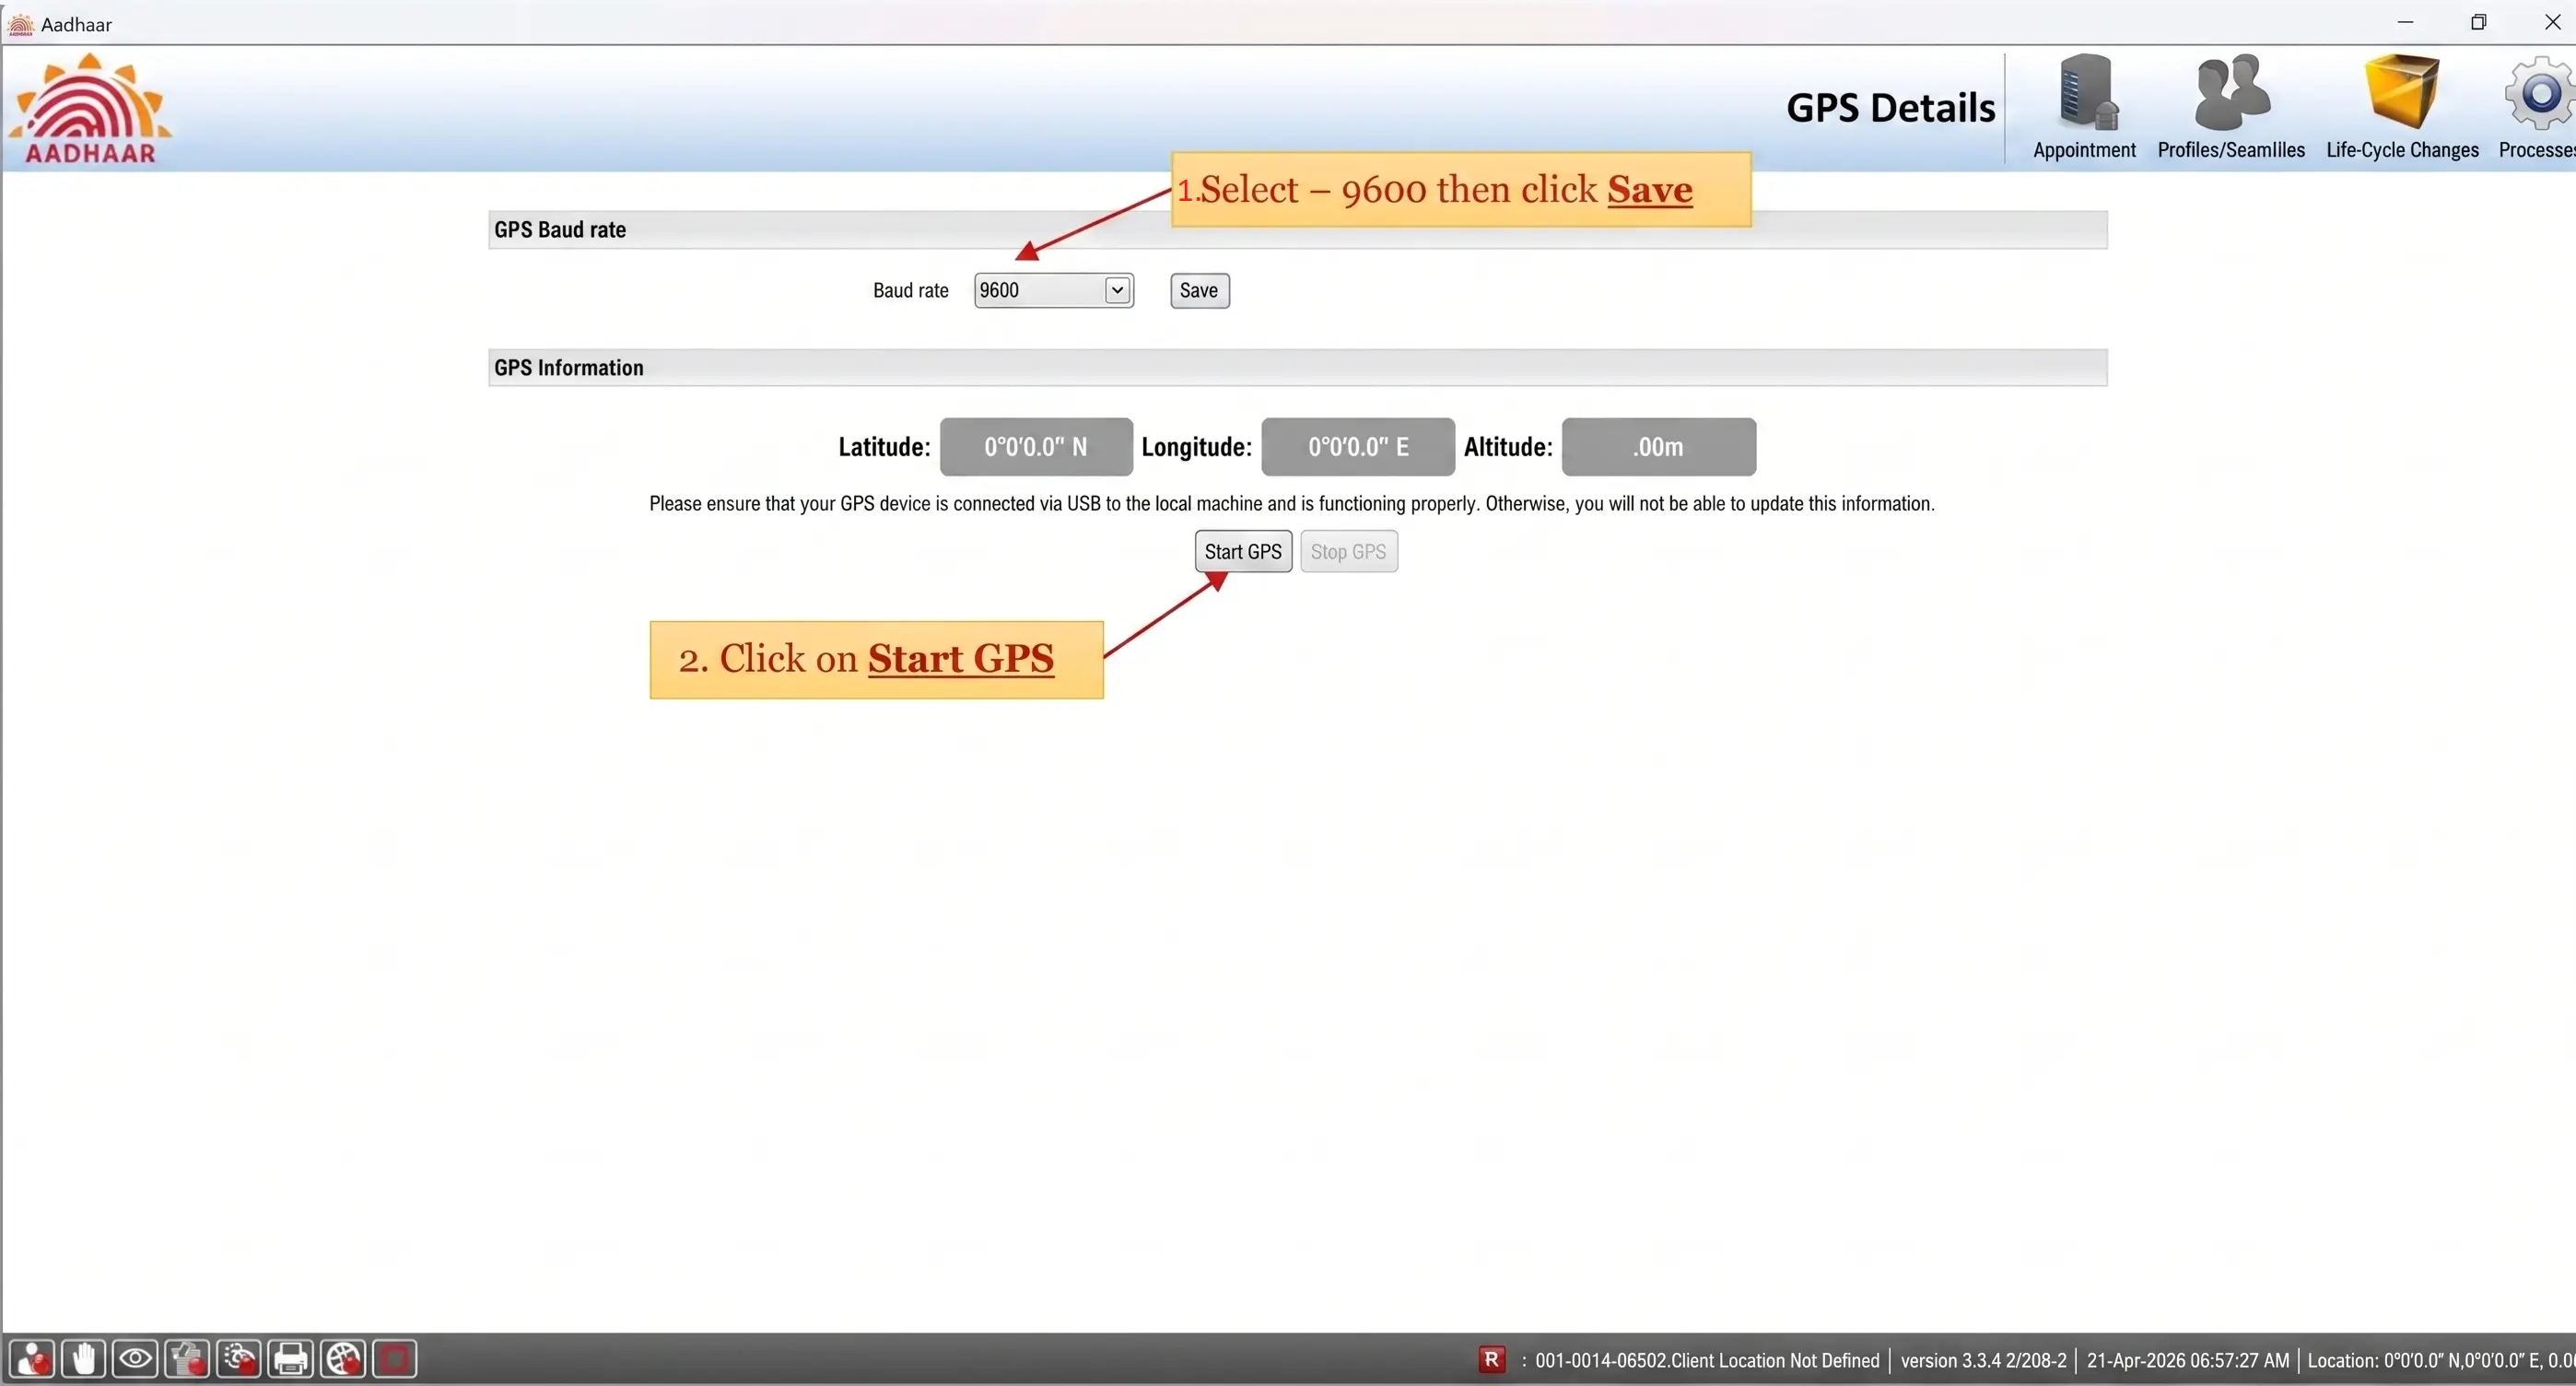
- ***Baud rate should be 9600 (In Analyser and also in Aadhaar Portal).
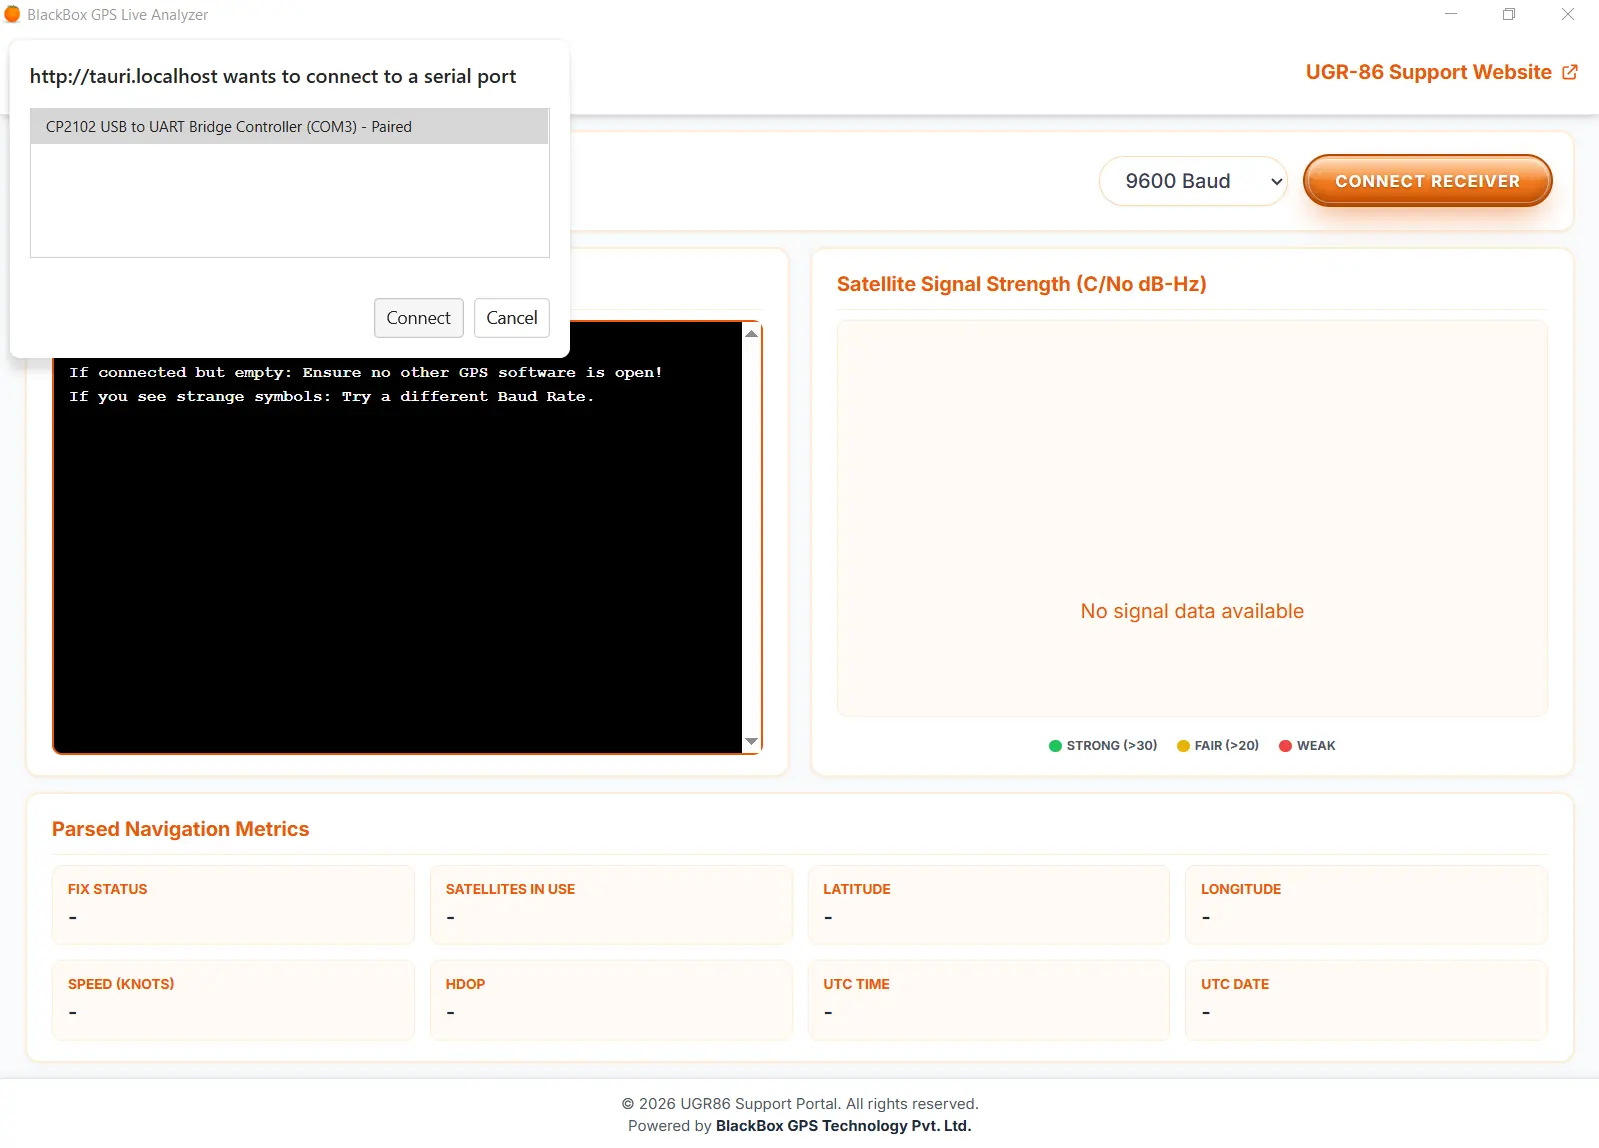
- Click on Connect Reciever.
- On left side Device Selection Popup will appear > Select CP2102 USB to UART Bridge Controller > Then Click Connect.
- Raw Data will start on left Side and satellite signal Strength on Right.
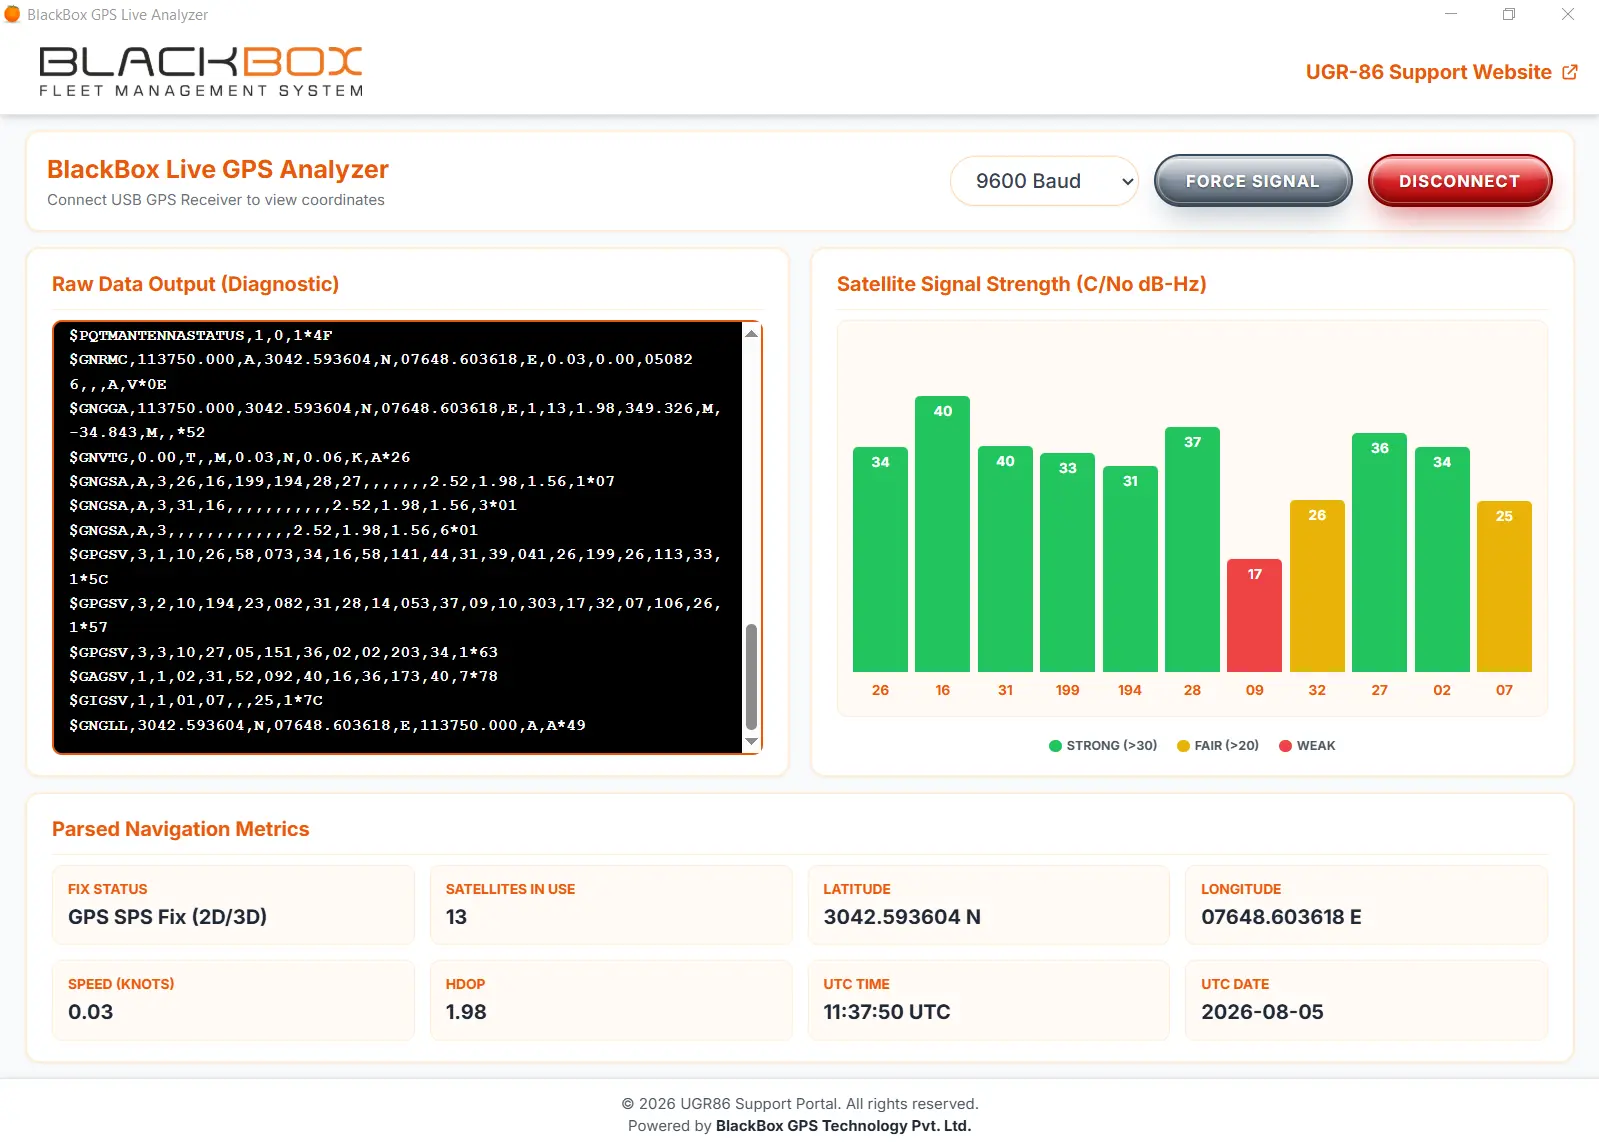
When the Parsed Navigation Metrics Latitude and Longitude got updated click on Disconnect.
Now Open the Aadhar Portal and Start GPS.
Important Instruction on Aadhaar Portal